Mount Whitney: What I Learned Hiking the Highest Trail in the Lower 48

The Trail
Distance:
22 miles round trip (depends on camp location + exploration)
Elevation Gain
~6,100–6,700 ft
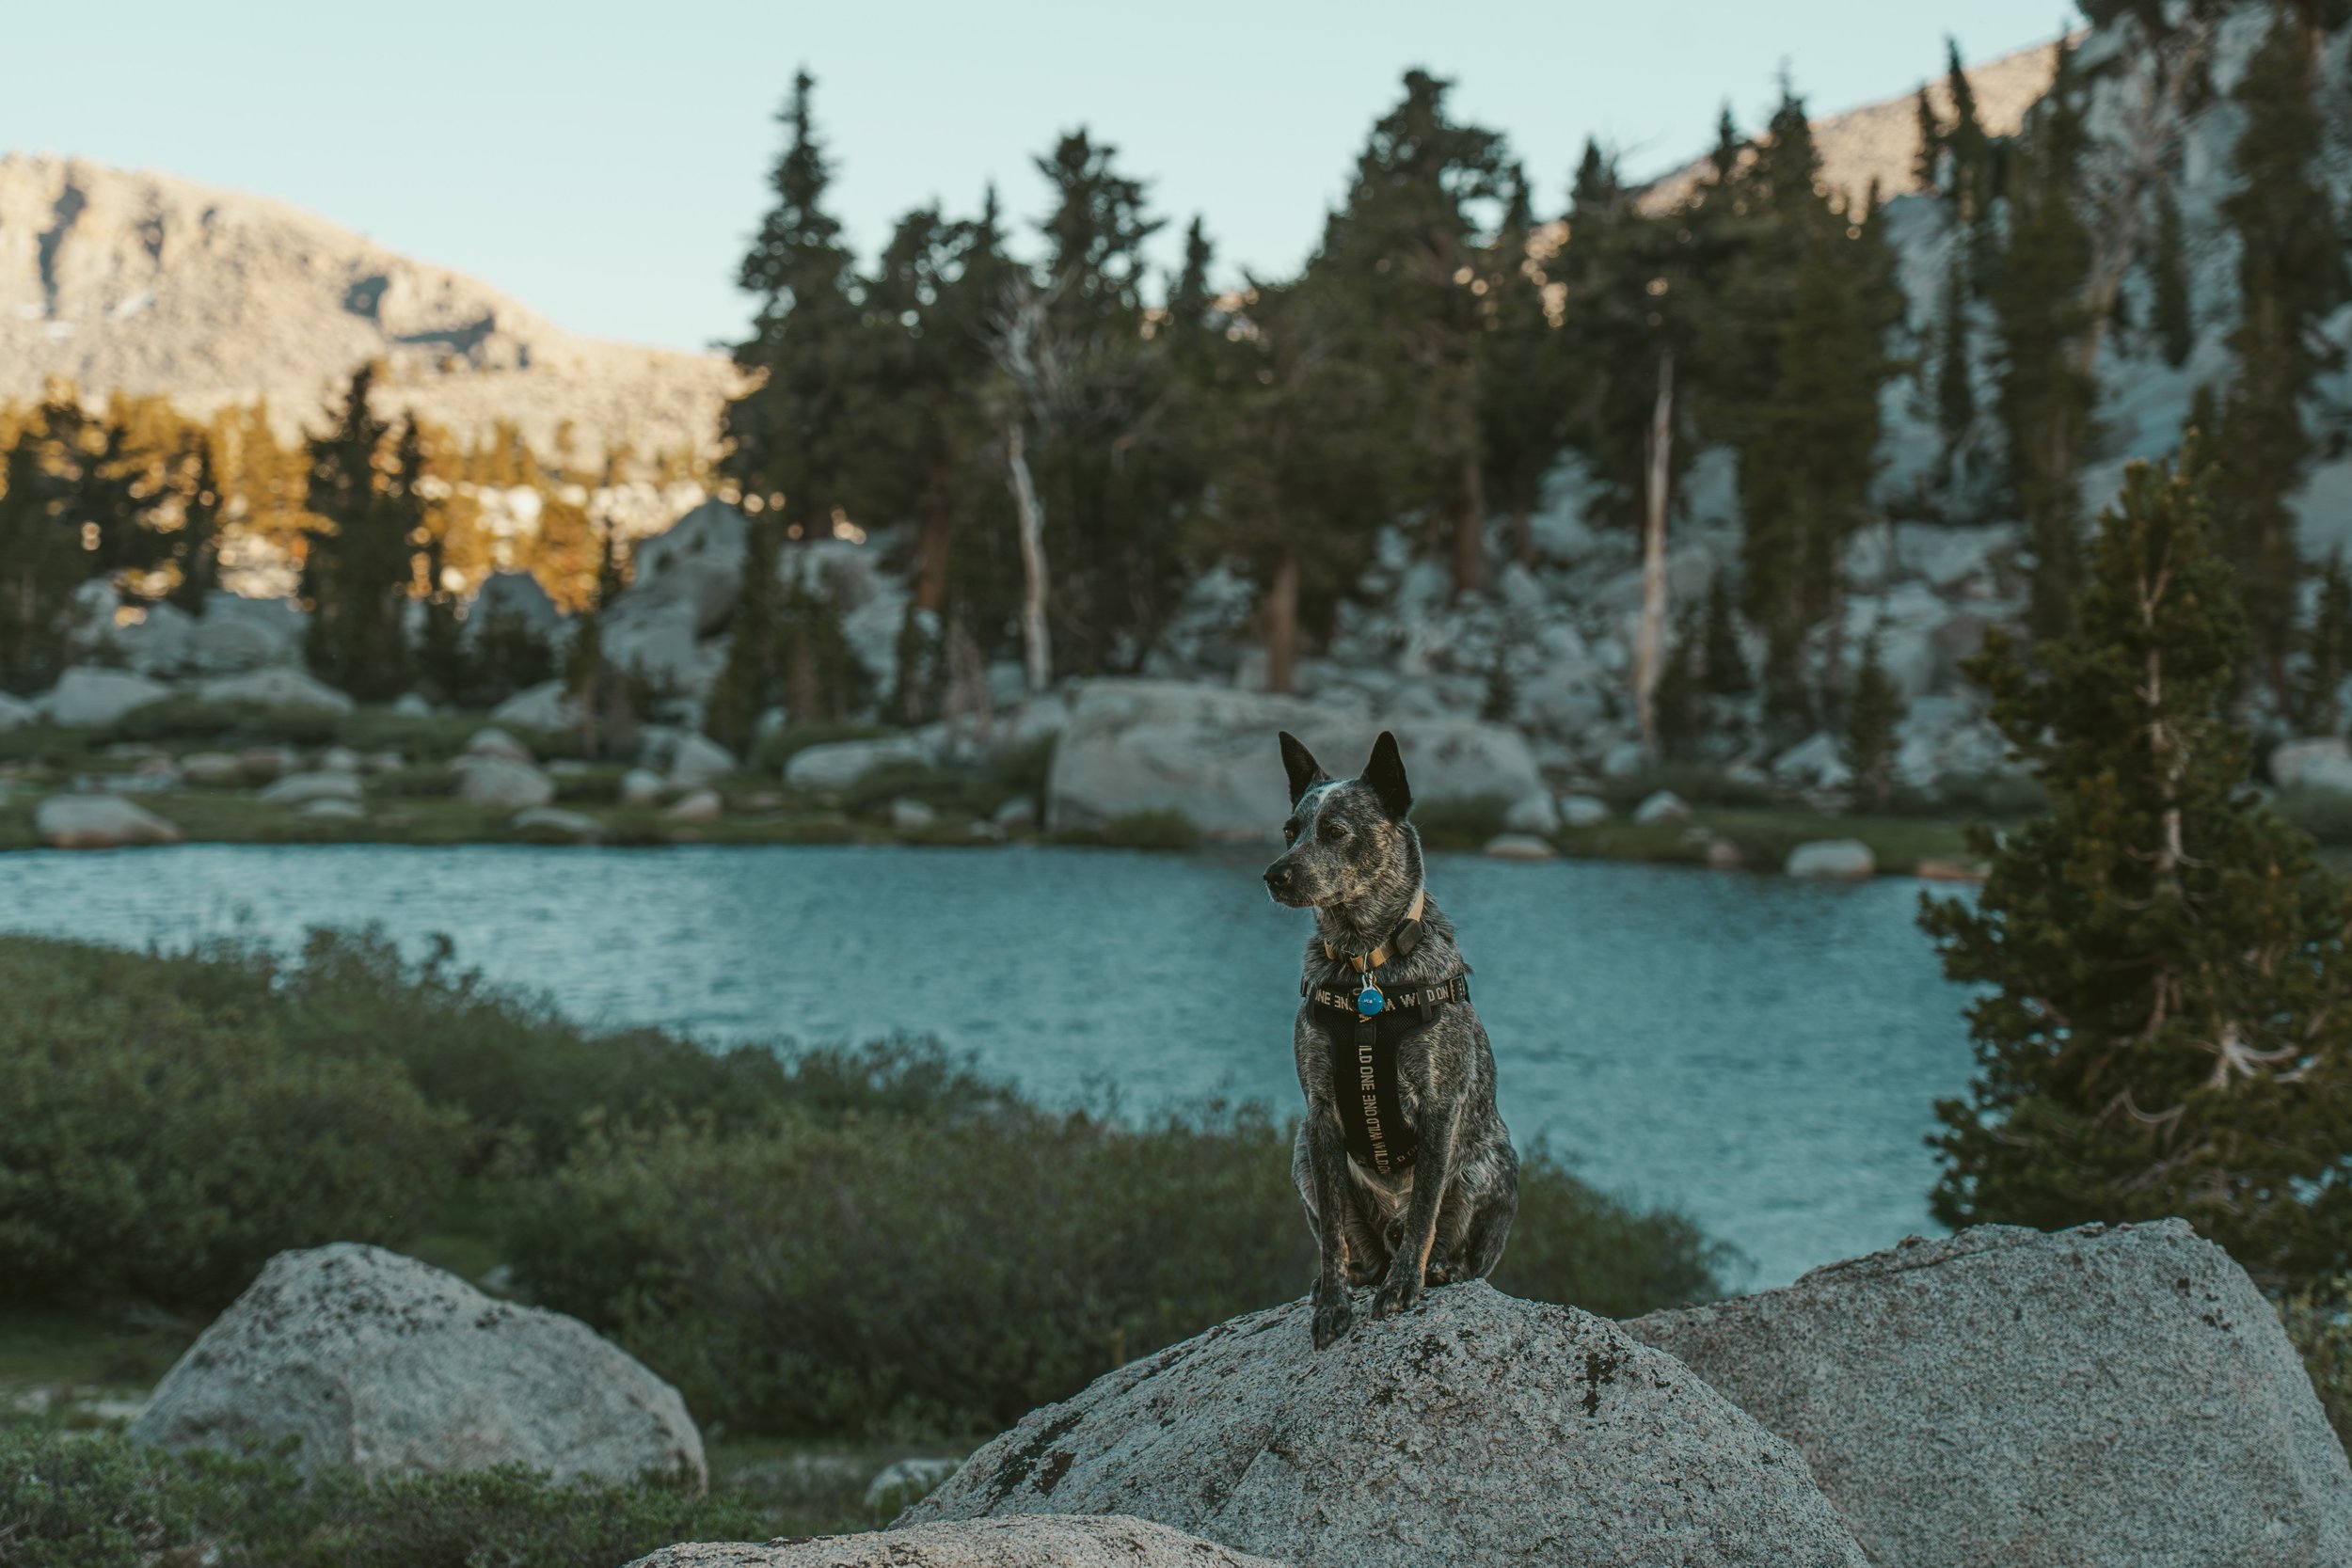
Dog-friendly:
No, dog are not permitted.
Difficulty:
Hard, Strenuous
Best time to hike:
Late July through mid-September
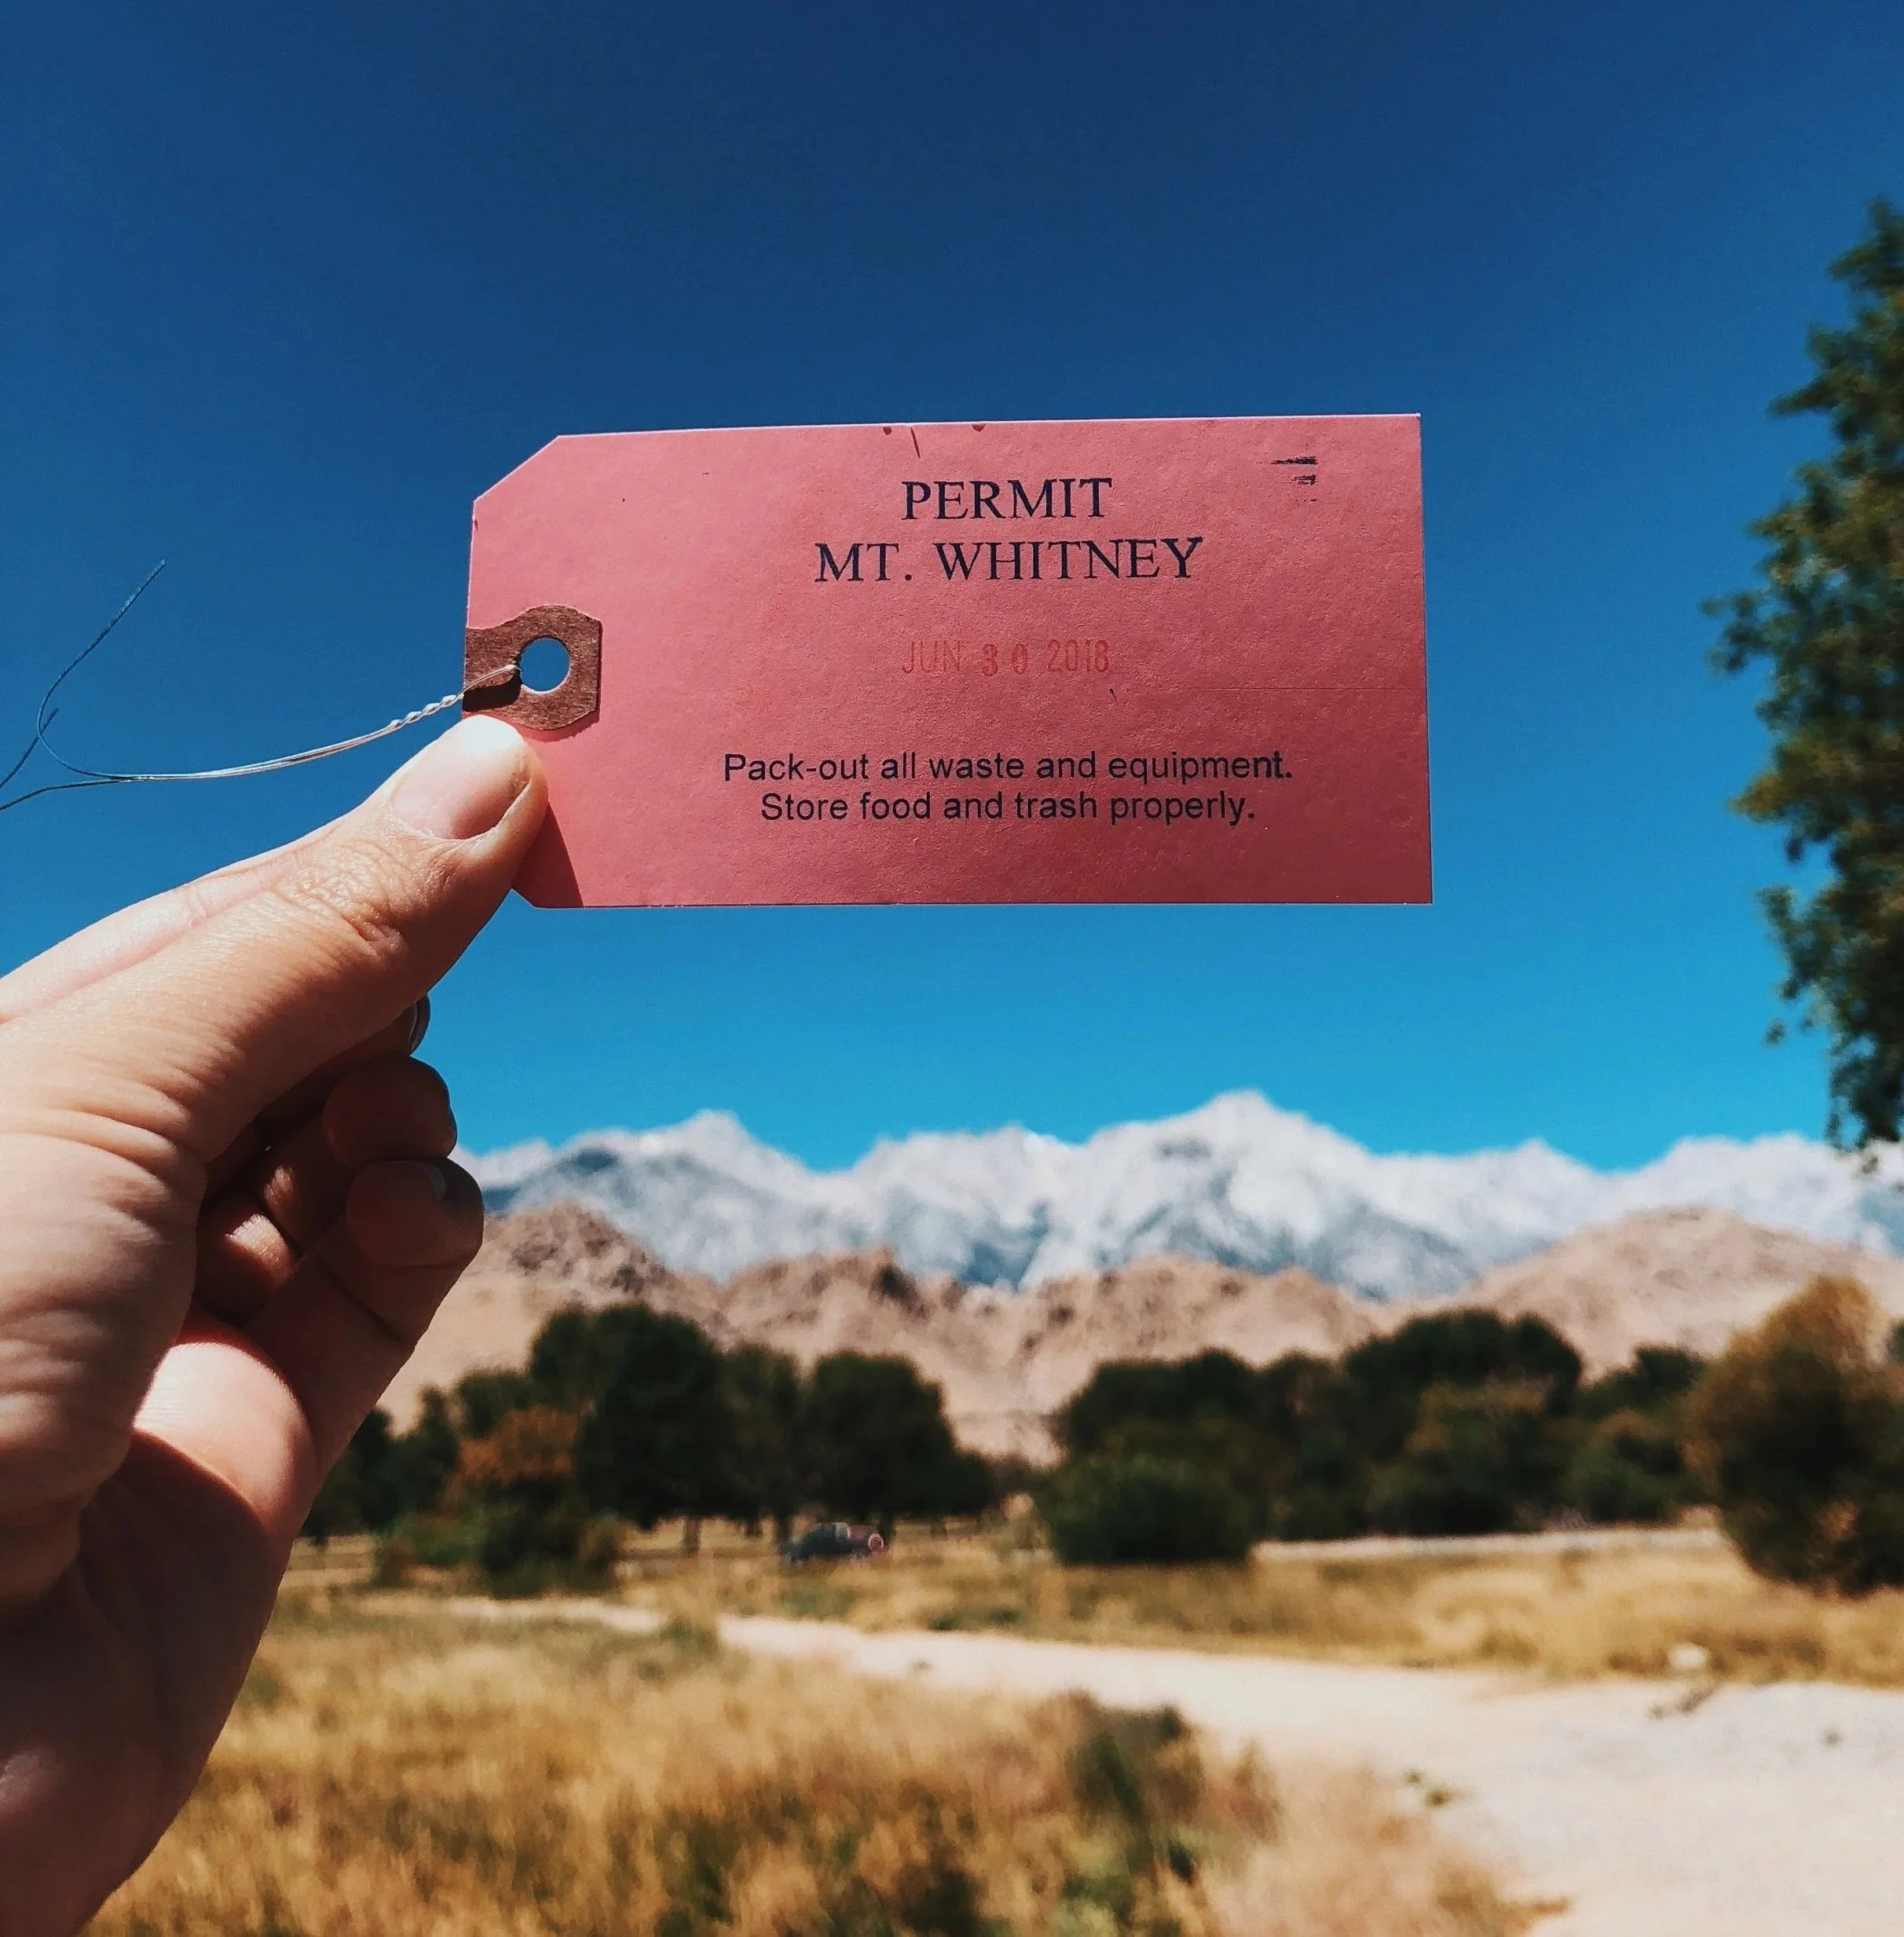
Permit Required?
Yes, through recreation.gov
I was home for the Holidays in the winter of 2017 when my brother and I solidified our deal to summit Mt. Whitney together in the summer of 2018. Even though we made a verbal agreement it still seemed a far off dream. Plus, the odds of getting a permit for the dates we wanted seemed slim to none.
That following April, while I was on my usual workday lunch-break-walk to Whole Foods, I got a text from my brother; we had miraculously secured overnight permits for the trail from June 30th - July 1st. Upon reading those words, I stopped dead in my tracks. This was really happening.
The Prep
Obtaining the opportunity to climb Mt. Whitney is in and of itself an uphill battle. This hike is extremely popular. In 2016, there was something like 65,000 people that wanted to hike or backpack to the summit from Whitney Portal during between June-September (prime hiking season). Because of that, a quota system has been enforced that allows only 100 day hikers and 60 backpackers at a time to hike from Whitney Portal between May 1st and November 1st. You can gain one of these quota-controlled spots by entering the lottery. Securing a spot is not an easy task, and you will have to attempt to get your permit a couple months in advance.
How do I get a permit for Mount Whitney?
The lottery for the trail is open between February 1 and March 1 and permits can be reserved via recreation.gov. Once the lottery closes, you have until April 21 to pay for the permits and solidify your permits. If you do not pay by this point in time, your permits will be released and available to others starting April 22.
Initially, my brother forgot to enter us into the lottery (I only found this out after the fact) but when they reopened the lottery in on that April 22 date for cancellations, we miraculously locked down overnight permits for the last weekend of June, during a nearly full moon and our conditions were absolutely perfect.
How do I physically prepare?
Now let's talk about the nitty gritty. Mt. Whitney tops out at 14,505 feet, making it the tallest peak in California AND in the Contiguous United States. The Mt. Whitney Trail is a round trip total of about 22 miles with nearly 6,200+ ft. of elevation gain, and while in the summer-time it requires little to no mountaineering skills, it is still a long, grueling hike and the extreme altitude and sporadic weather is nothing to mess around with.
As soon as my brother gave me the news that we had secured spots for the end of June I realized, I only had 2.5 months to prepare. Now, let’s be real, I'm a Creative Director at a branding agency. There are days I work well until midnight on wild deadlines, with my butt sat in a chair staring at a screen for hours on end. Not to mention, after my wedding in 2017, I had been giving myself a real hall pass when it came to working out. So physically, I was not in the right kind of shape to be climbing something of this magnitude.
Prioritizing my exercise was crucial. During the week, I would make sure to either find trails outside with considerable elevation gain, or utilize the treadmill and stair-master at the gym when that wasn’t possible. I also began consistently working HIIT and yoga into my schedule. Personally, when it comes to hiking, a lot of the struggle is mental stamina, and I knew there would be a lot of monotonous switchbacks on the Whitney Trail, so building some similar-style hikes into my routine was important as well.
Do I need to acclimitize for the elevation?
At the time I pulled my Whitney permits, the highest I’d ever hiked or camped was around 8,500 feet. Living in Los Angeles also meant I was spending almost all my time at sea level, so altitude sickness was a very real concern for me.
I went deep into research mode on AMS before the trip. Probably too deep. I learned that a lot of people take Diamox, a prescription medication that can help with altitude symptoms (I didn’t), and that things like aggressive hydration, ibuprofen, and some form of elevation acclimation beforehand can make a big difference. So the week leading up to our trip, I made it my mission to drink about a gallon of water a day. I also brought Tylenol and took it the mornings we were hiking. While I definitely had moments of exhaustion on the mountain, I never dealt with nausea, confusion, headaches, or stomach issues which was huge for me, especially since I’m very prone to migraines. Something was clearly working in my favor.
One of the best ways to prepare for Whitney is to get some longer and higher-elevation hikes under your belt. I didn’t get as much time above 9,000 feet as I would’ve liked, but about four weeks before our trip I solo-hiked Mt. Baden-Powell. It’s one of those perfect mental training hikes: long, steady, and full of endless switchbacks, with about half the trail above 8,000 feet.
Since the first day of our Whitney trek would be around six miles, I also made sure to log plenty of 6+ mile hikes at lower elevations in the weeks leading up to the trip. That helped prep my legs for both the distance and the climbing. Southern California is packed with great training trails, and AllTrails was my go-to for finding routes that matched what I was building toward.
If you're in Southern California, here are some other great training hikes:
Mt Baden Powel (8.5 miles, 2600 ft. gain)
Mt Baldy via the Devil’s Backbone (11 miles, 3800 ft.gain)
Mt Wilson from Chantry Flat (14 miles, 4100 ft. gain)
San Bernardino Peak Hike (16 miles, 4600 ft. gain)
San Gorgonio Hike (18.5 miles, 5400 ft. gain)
San Jacinto from Idyllwild (19 miles, 5000 ft. gain)
You can also prep by joining Socal Hiker's 6 Pack of Peaks challenge (it has includes most of the above peaks). I haven't attempted it yet - but it's an awesome pursuit either way.
Aside from hiking and exercising I did a lot of armchair research. My husband can certainly vouch for that. I might have driven him a little nuts every night before bed, scrolling through the Whitney Forums, looking at the trail conditions or checking posts on the Mt. Whitney Facebook Group. I was low-key obsessed with the weather leading up to our trip. Even though Southern California had a relatively dry winter, the temperatures on the mountain just weren’t warming up fast enough. That meant the snow and ice on the most dangerous section of Whitney, the infamous 99 switchbacks near the cables, wasn’t melting. If that section stayed closed, the normal trail from Trail Camp to Trail Crest wouldn’t be passable.
And when that happens, the only way up is via the snow chute: a 1,200-foot vertical snow climb that requires crampons, an ice axe, and real mountaineering skills. I felt confident as a hiker, but this was outside my experience. I had never glissaded, never practiced self-arrest, and the idea that our summit attempt could come down to a technical snow climb was honestly terrifying.
If you’re planning to hike Whitney early in the season (before July) or late in the year (after September) and you don’t have winter mountaineering experience, it’s absolutely worth getting some training. REI runs seasonal snow travel and mountaineering classes, and there are also great outfitters around Bishop and Mammoth Lakes that offer full-day skills courses. Conditions on Whitney change every year, and being prepared for snow travel can be the difference between a dream trip and a forced turnaround.
What to pack for an overnight?
Backpack & Storage:
Bear canister (required)
Pack liner or dry bags
Shelter & Sleep System
Lightweight tent or bivy
Sleeping bag (15–30°F recommended, even in summer)
Sleeping pad (insulated)
Pillow or stuff-sack pillow
Clothing (Layering Is Everything)
Moisture-wicking base layer (top & bottom)
Hiking pants or leggings
Sports bra / underwear
Wool or synthetic hiking socks (extra pair for sleep)
Insulating layer (down or synthetic puffy)
Fleece or mid-layer
Rain jacket
Rain pants (optional but smart)
Beanie
Lightweight gloves
Buff or neck gaiter
Broken-in hiking boots or trail runners
Camp shoes (optional, but Trail Camp feet will thank you)
Food & Kitchen
Bear-can–approved food (1 dinner, 1 breakfast, summit snacks)
Backpacking stove + fuel
Lighter or matches
Mug (optional but cozy)
Trash bag (pack it all out)
2–3L carrying capacity (bladder + bottle combo works well)
Navigation & Safety
Headlamp (with fresh batteries)
Phone with offline maps
Paper map (backup)
Sunscreen (high SPF)
Lip balm with SPF
Sunglasses
Hat
Toiletries & LNT
WAG bag (required)
Toilet paper + sealable bag
Hand sanitizer
Optional or Seasonal Gear
Microspikes or crampons (early season or lingering snow)
Ice axe (only if trained + conditions require it or your summiting via the Chute)
Helmet (snow chute conditions)
Camera / GoPro (summit regret is real 😉)
The Climb
Before I knew it, my brother was landing at LAX and we were huddled in my living room shaking out our gear. That evening we made sure fill up on plenty of carbs and then came home early to get a proper night's sleep before heading to Lone Pine the following morning.

We got a later start than planned, rolling out around 8 a.m. and reaching Lone Pine just before 11 to pick up our permits. After about a half-hour of checking in and getting our passes, we were finally free to wind our way up to Whitney Portal.
Arriving at the Portal was a funny reminder that even though you’re headed into the wilderness, you’re still not that far from Los Angeles. The parking situation definitely reflected that. Finding a legit spot wasn’t easy, and for a minute I was convinced we were going to be circling forever while precious daylight ticked away. Luckily, we scored a spot in the overflow lot.
Before heading out, we cleared every scented item out of the car. Bears are very real up there, and if they smell anything remotely interesting, they won’t hesitate to break in. The last thing you want after a 22-mile hike is to come back and find a bear sitting in the driver’s seat.
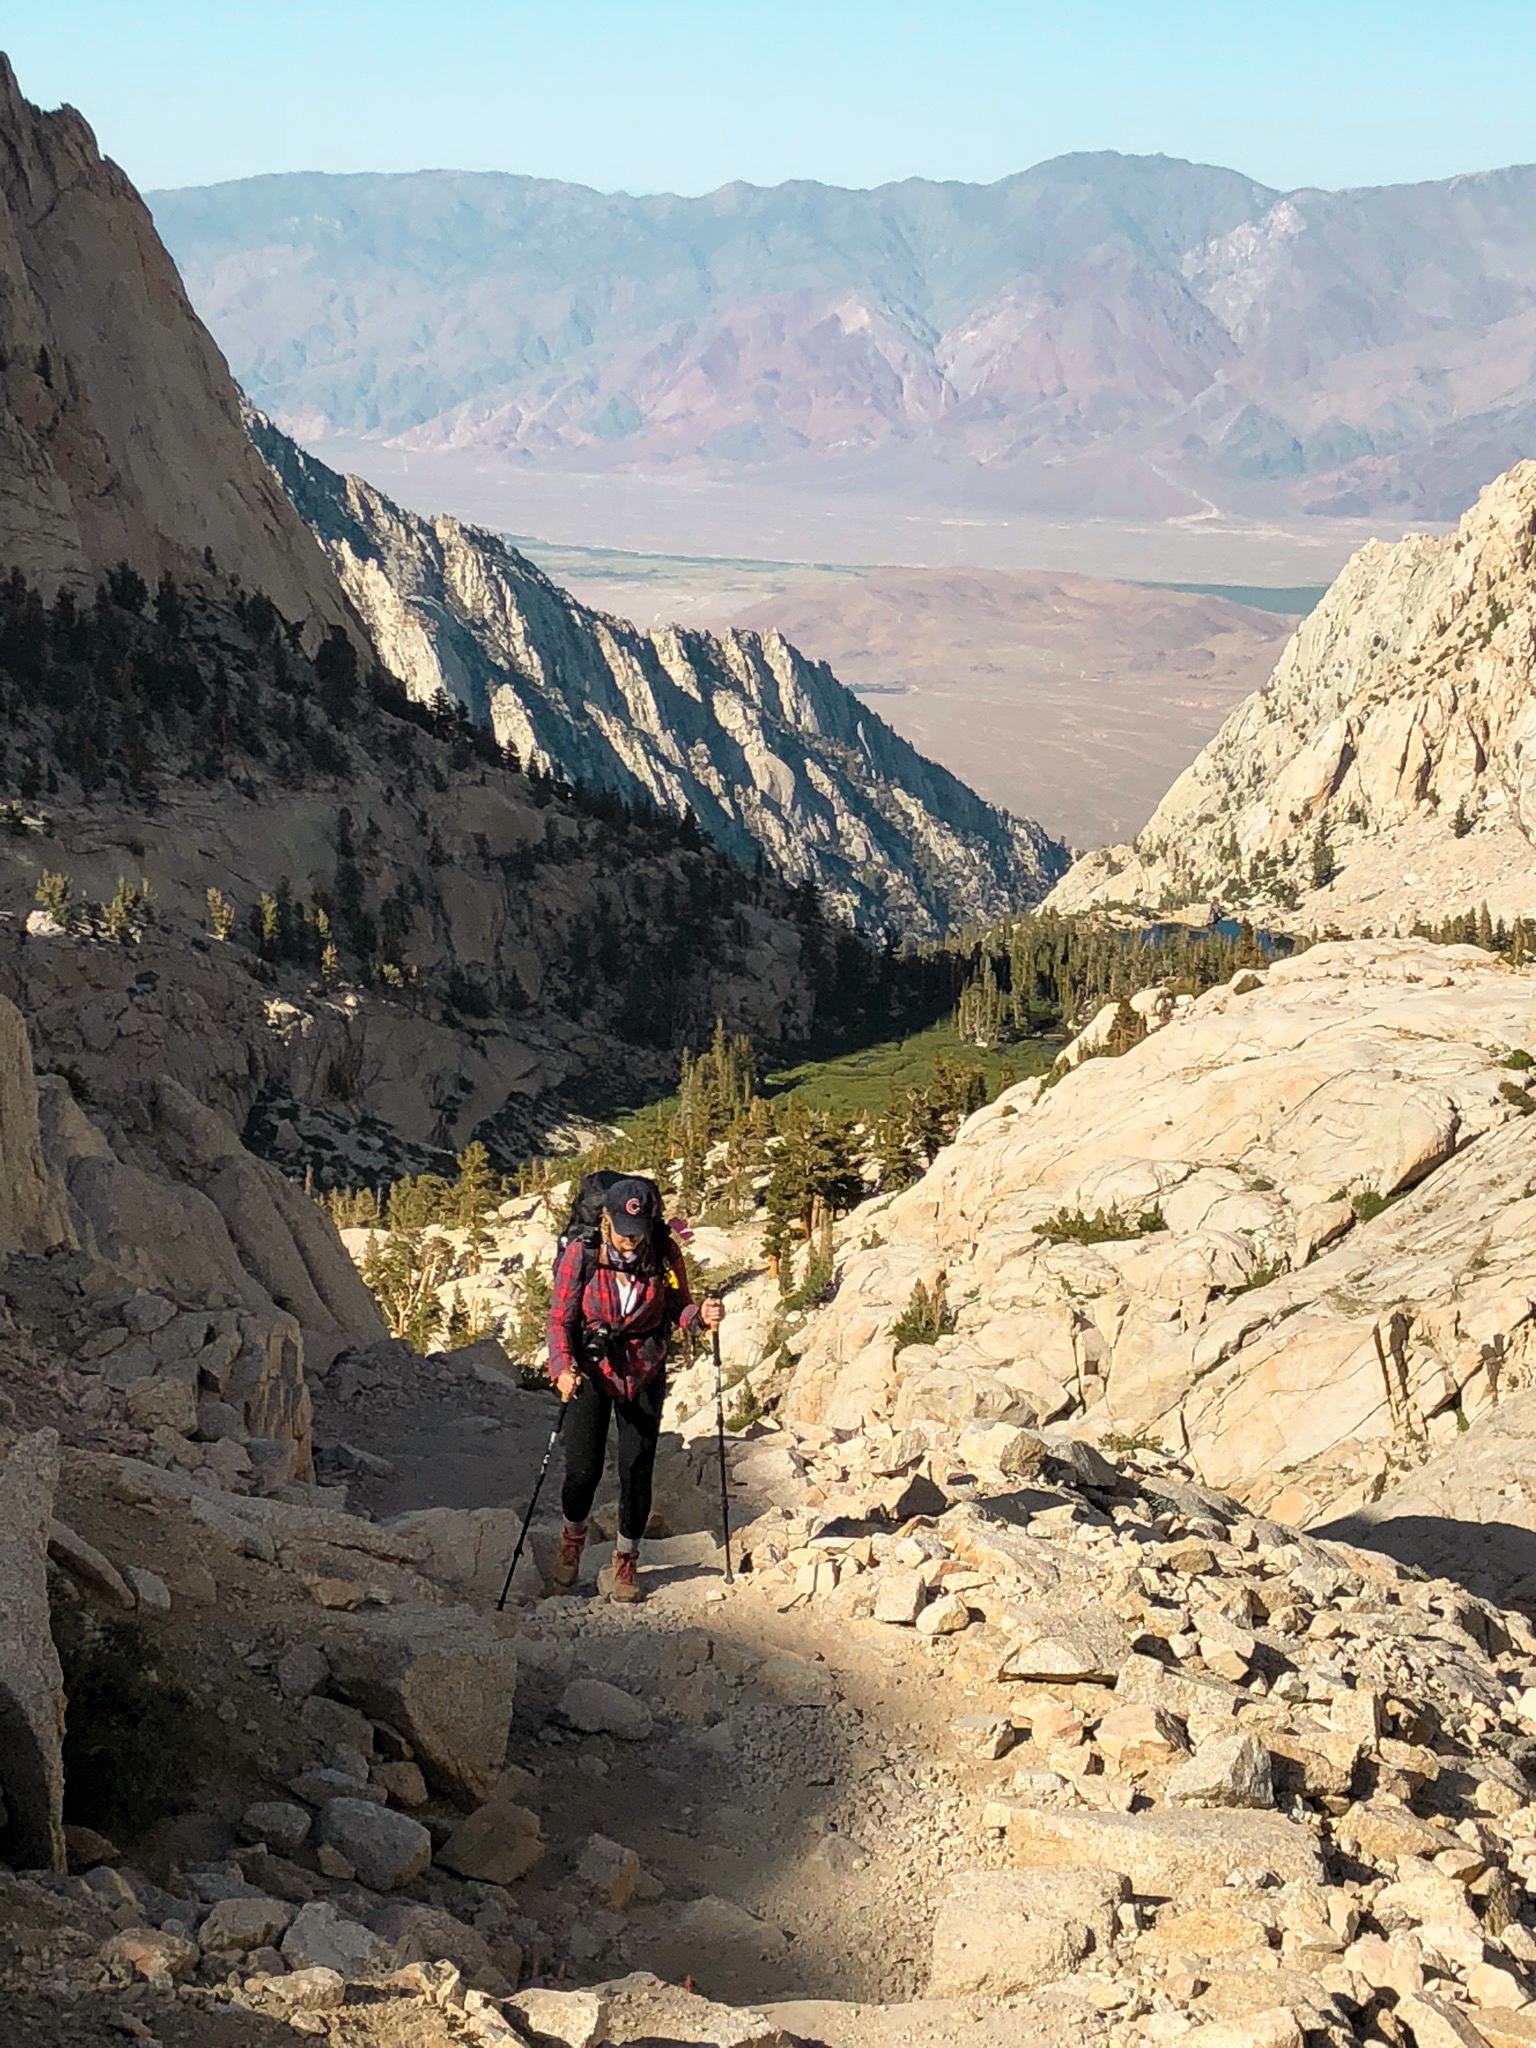
Whitney Portal also has a small general store stocked with basic gear, snacks, and a menu of famously good burgers. We grabbed a few last-minute essentials and headed for the trail. Right by the trailhead there’s a pack-weigh station. Mine came in just under 30 pounds, and my brother’s was around 35—definitely not ultralight, but manageable for what we were about to tackle.

The first half mile of the trail feels like any typical forest hike. Honestly, it was the hardest part for me. Not because it was physically difficult, but because I was so eager to get to the good stuff. The waterfalls, the meadows, the alpine lakes. The views were already pretty, but my impatience somehow made my pack feel twice as heavy.

Around the half-mile mark we hit our first of many stream crossings, and the landscape immediately started to open up. A few tenths of a mile later, we reached the crossing of the North Fork of Lone Pine Creek, a spot made famous by the fallen logs that serve as a makeshift bridge.
At about 2.8 miles in, you reach the junction for Lone Pine Lake. I’d heard so many people rave about it that, even though we were already a little behind schedule, my brother and I decided to take the 0.1-mile detour down to the shoreline. I only wish we’d dropped our packs at the junction, because the climb back up was no joke and definitely dipped into our energy reserves. That said, it was absolutely worth it. The lake was impossibly glossy and blue, the kind of place that makes everything else fade away for a minute.


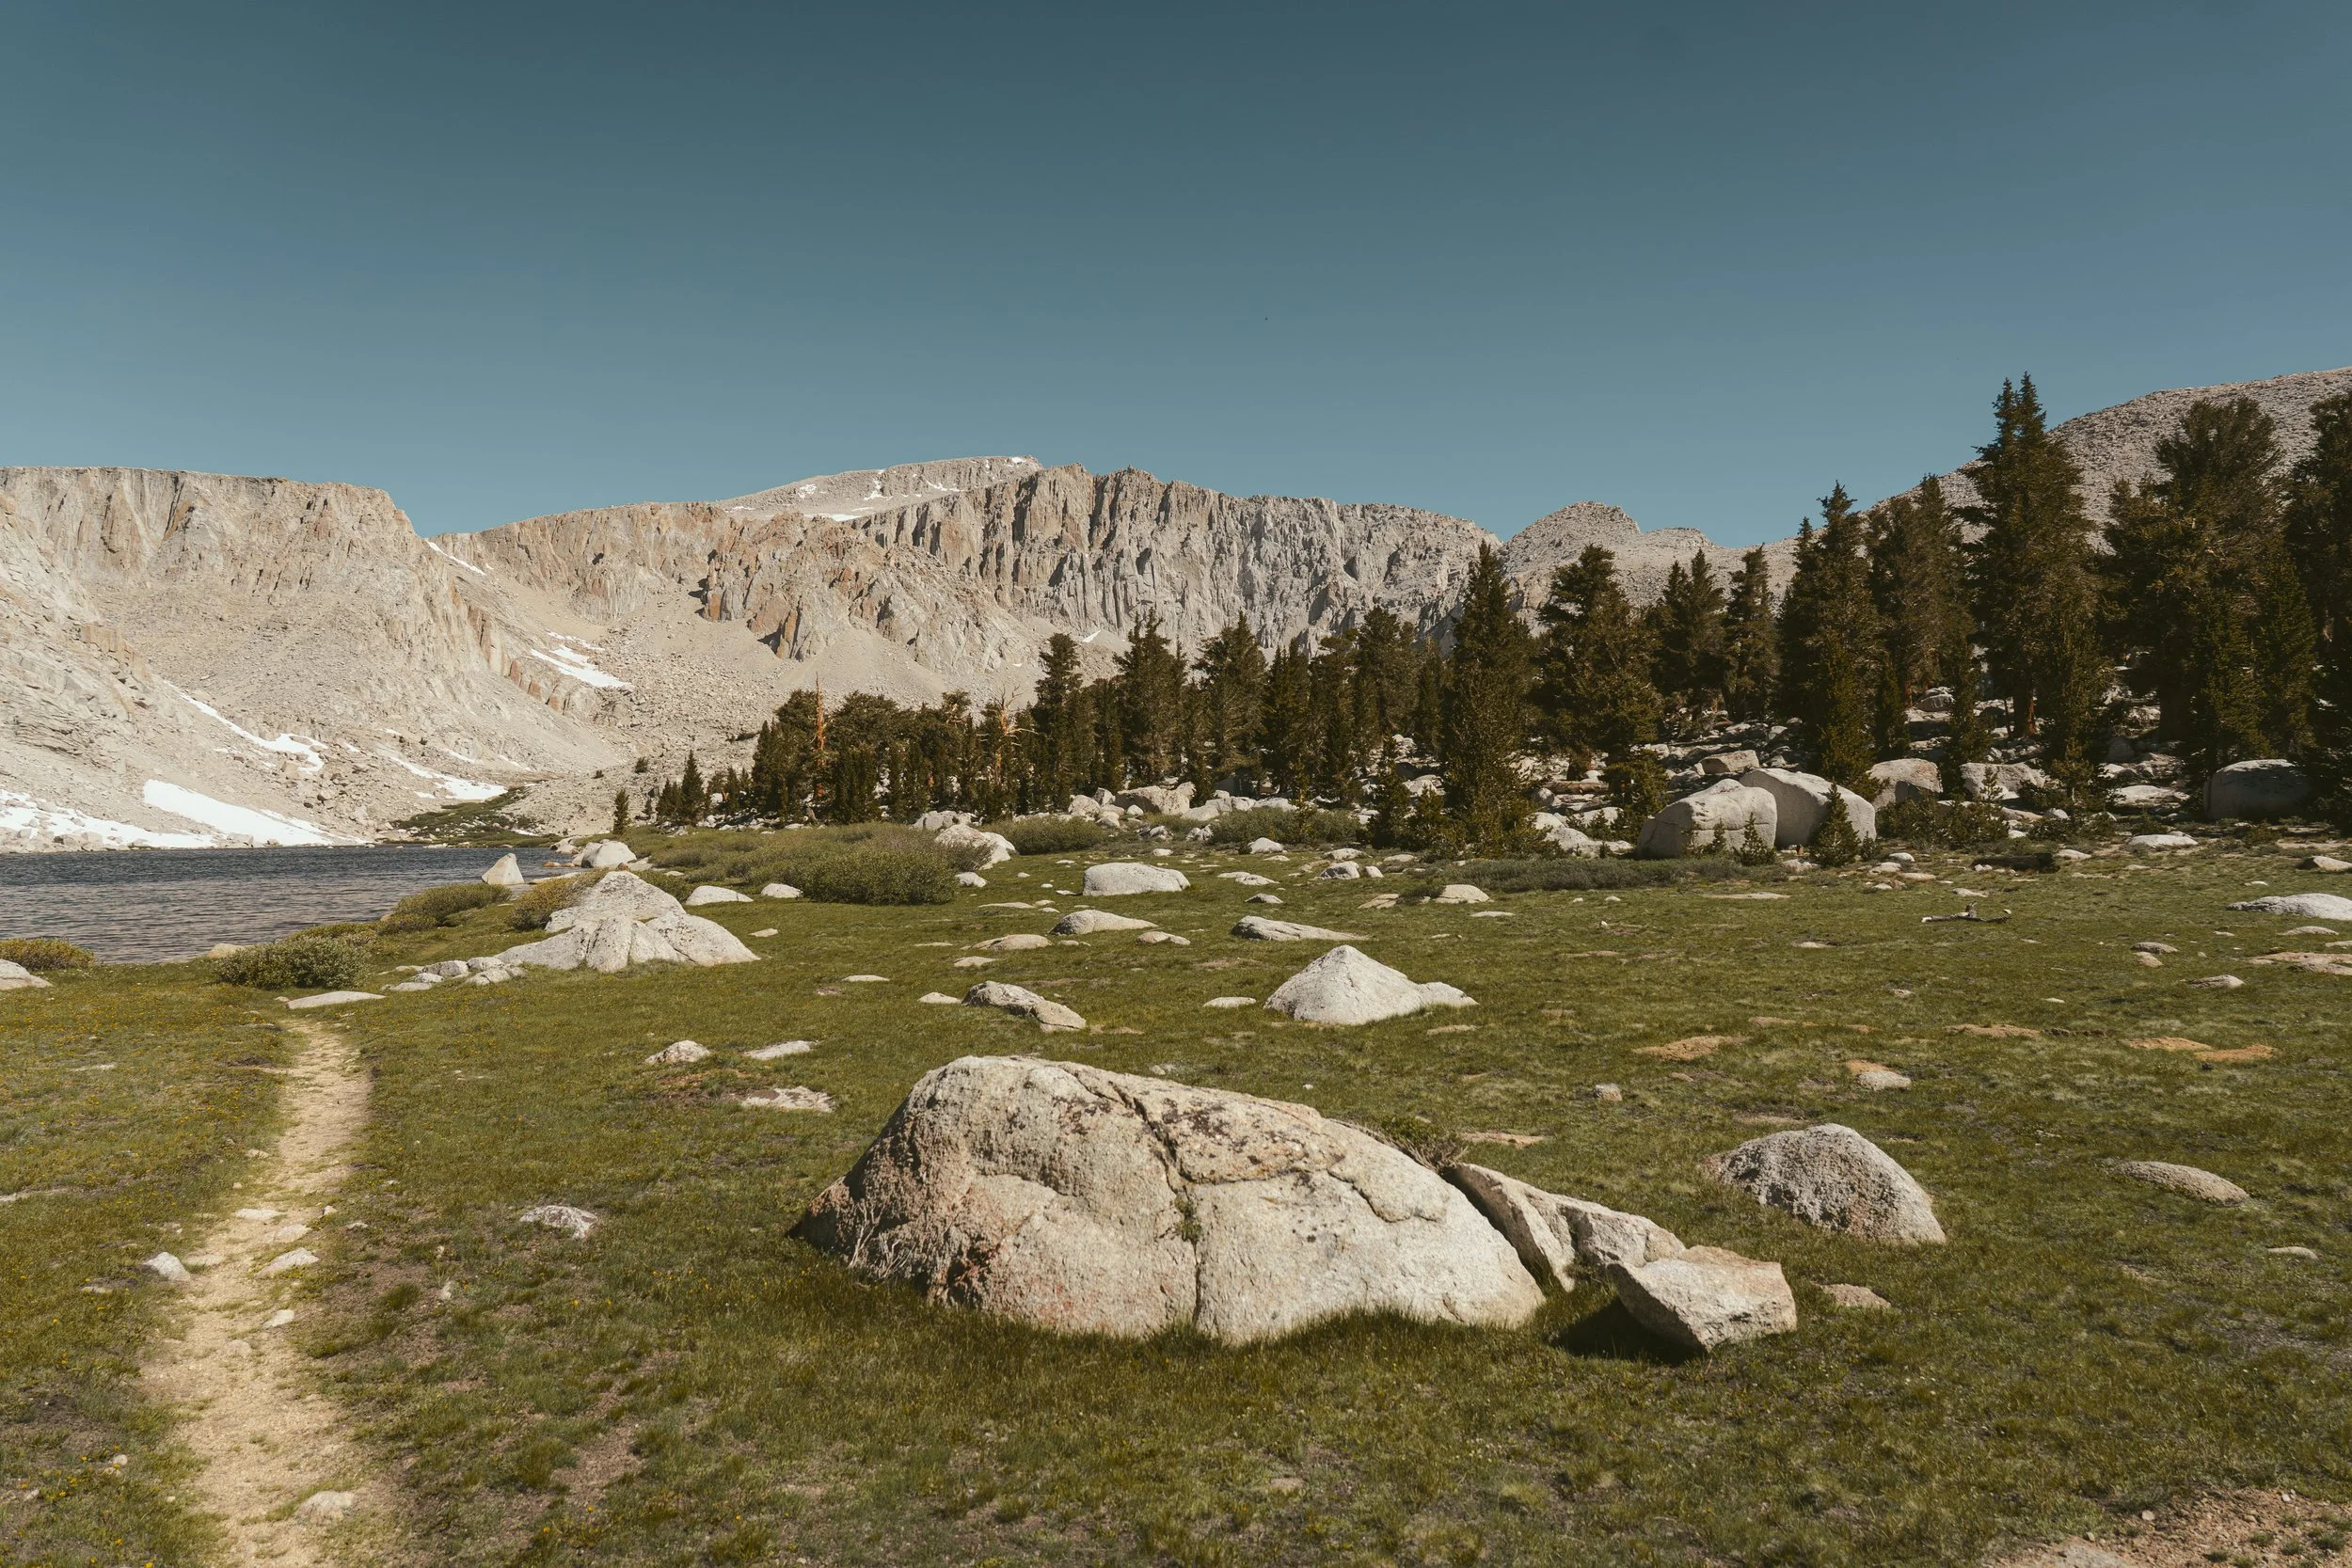
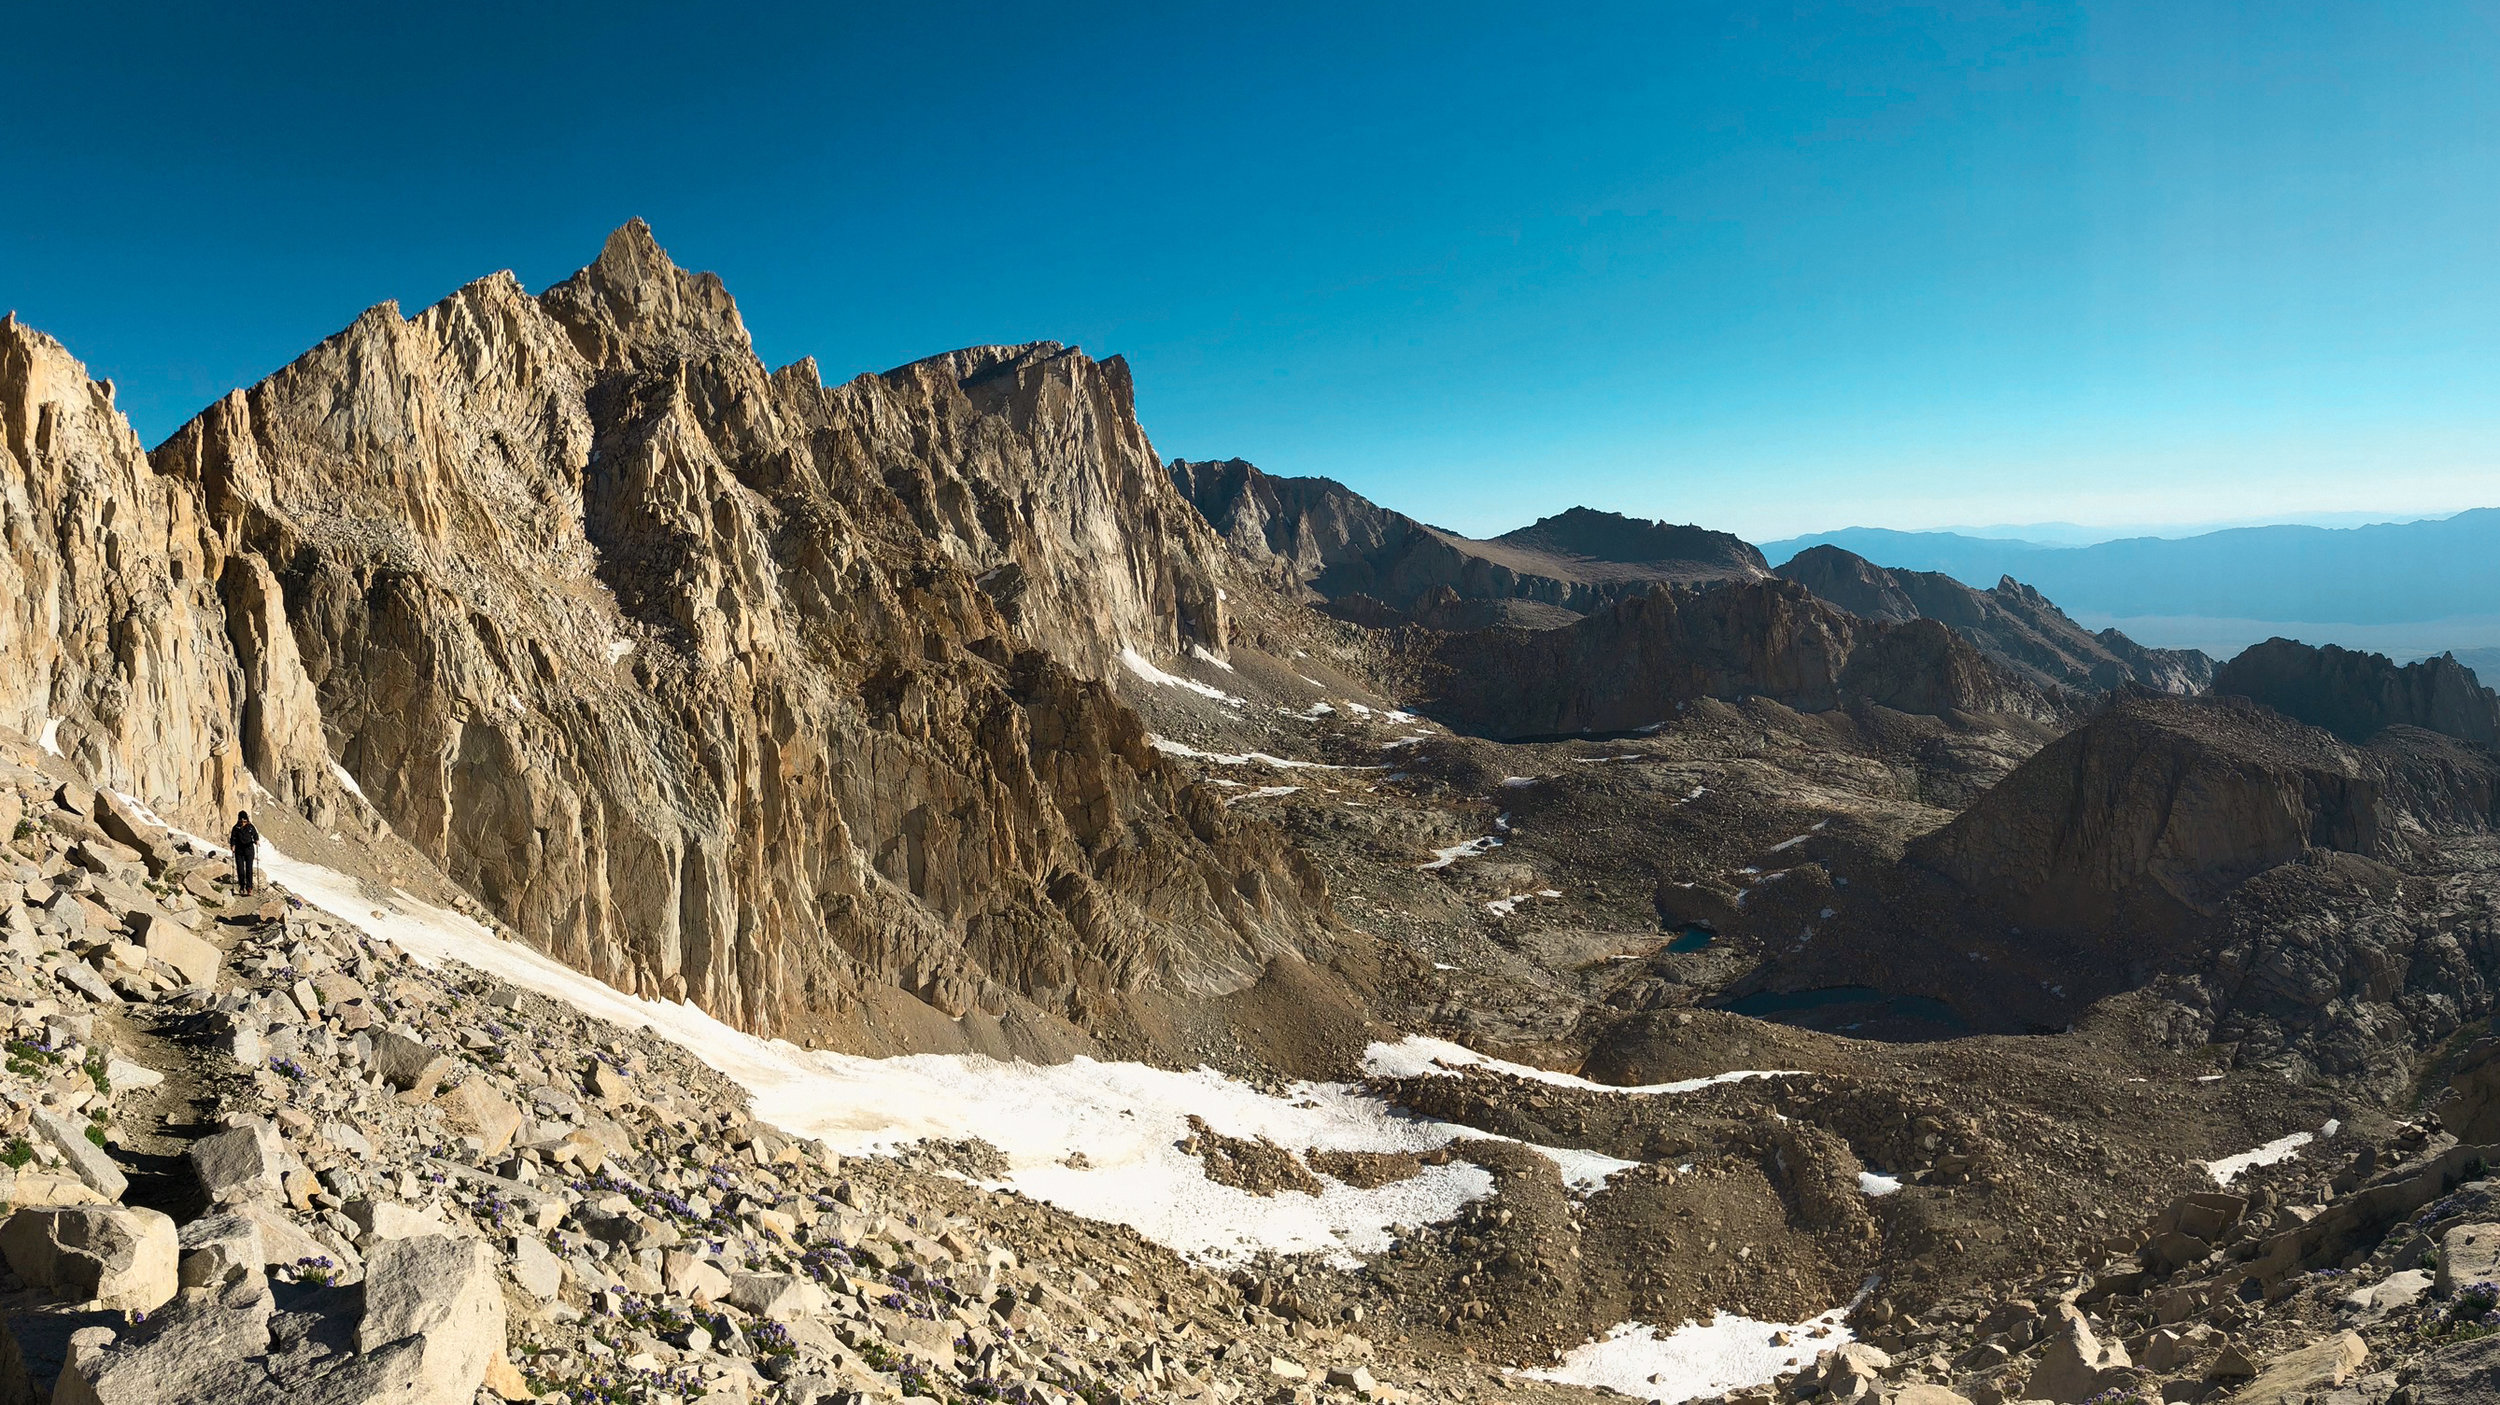
When we finished soaking in the views at Lone Pine Lake we retraced our steps back to the Whitney trail and continued on our way. This next section of the trail contained a lot of switchbacks, and during this stretch we finally broke 10,000 feet and officially entered the Whitney Zone. I felt a pang of emotion as we crossed over 10k. I had never been that high in elevation and while my pack was starting to literally weigh on me, I otherwise felt great.

Suddenly we began to descend and were greeted by Bighorn Park, a super lush meadow nestled right between these humongous granite monolith formations. This part of the trail is awe inspiring. We took a moment here to just stare up at our surrounding. It’s a magical spot.

Throughout this portion of the trail, we found ourselves crossing more low streams and having to get our feet a bit wet. Eventually we came upon Outpost Camp which is around the 3.8 mile marker and 10,360 feet in elevation.
Outpost Camp is the first of the two main camps on the Mount Whitney Trail. It's a beautiful spot to camp, but we made the decision to continue on up to Trail Camp to make our morning ascent a bit easier. However, if you're breaking your overnight trip up into multiple nights, I would highly recommend posting up here too. The scenery is absolutely stunning.

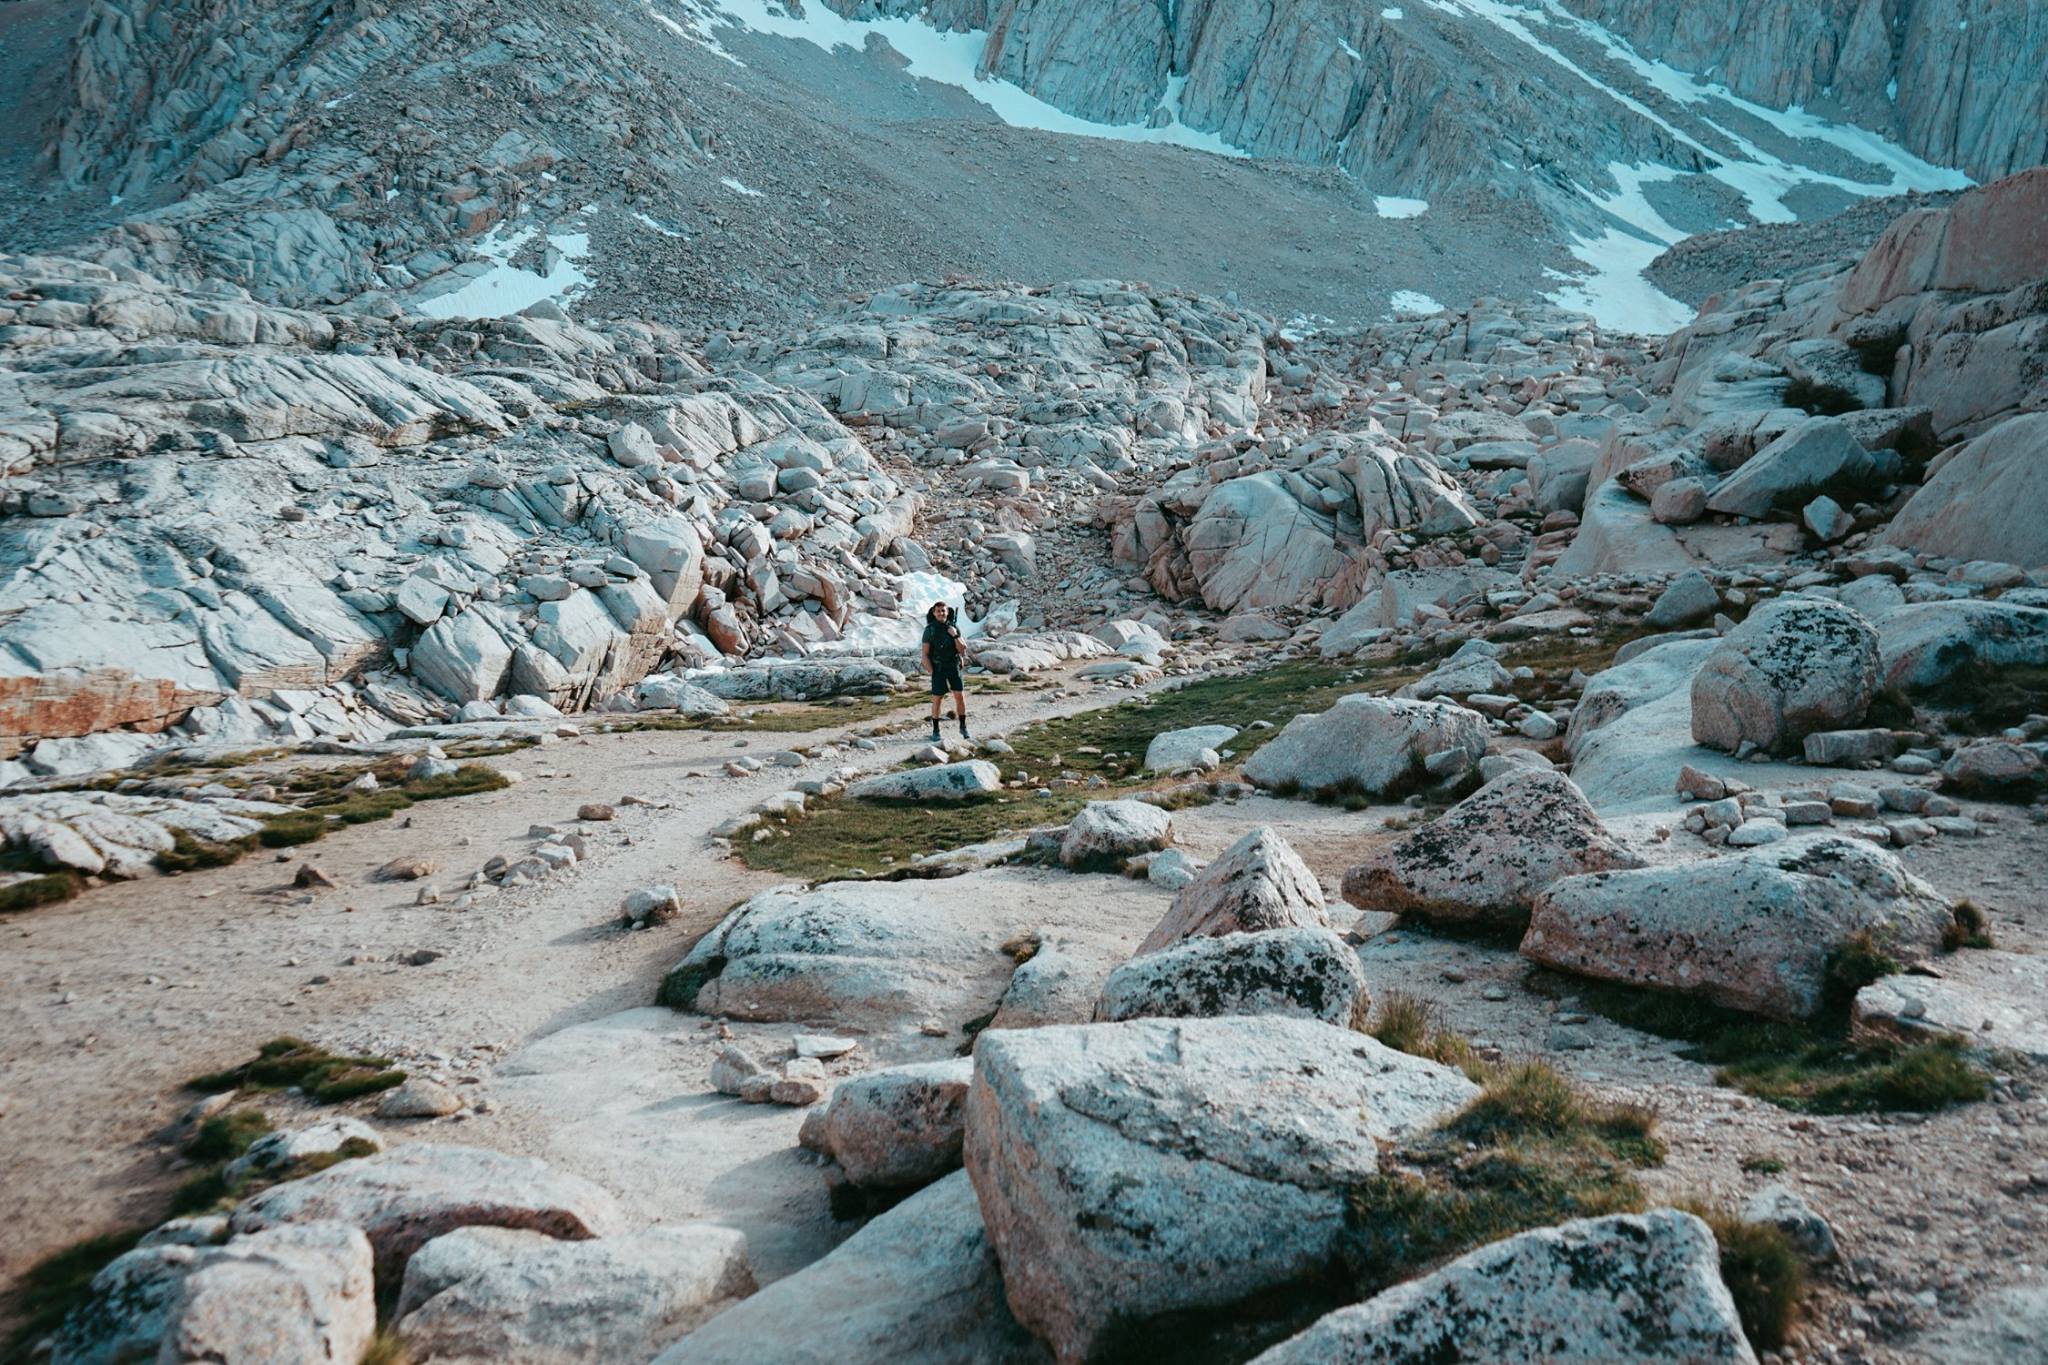
As we passed through Outpost Camp the ground began to change from soft dirt to full on granite and your feet and knees really start to feel it. We continued to gain elevation along the hard granite trail and as we made our way upward we found ourselves looking down over beautiful Mirror Lake. At this point Trail Camp begins to feel so close, but still so far.
My brother and I are very different hikers. He is fast and athletic and wants to get to where he is going without pause. I, on the other hand, am what you call a slow hiker. I love to take frequent breaks to take pictures, and gawk at the grandness of it all. You'll see in most of our photos and video he's always about 100 feet ahead of me waiting. But somehow we made it work without too much bickering. My brother started a system that helped motivate me to keep climbing: every 500 ft. of elevation we gained I was allowed to take a break where I could take my back pack off, snap some photos, nosh a little and give my shoulders a rest.
During one of our breaks above Mirror Lake we decided to rest in the shade of a giant boulder and fuel up on snacks. Just as we were hoisting our packs back on to head back up the trail we heard what sounded like a gun shot. It was extremely unnerving and a little confusing. But then, as I turned the corner around the boulder, I saw it: a massive rock slide was barreling down the side of the mountain just in front of us across the canyon.
Scale in the mountains is really hard to judge. We stood watching these massive boulders come tumbling down the face, taking out everything in it's path and then suddenly we were panicked... How far away was it really? Could it reach us? It was hard to tell, so just to play it safe we jumped back behind our giant boulder and waited until the sound of tumbling rocks subsided. To be honest, we were ever in any kind of real danger, but it was certainly a humbling moment and a reminder that we were in fact at the mercy of this massive mountain.
After this little scare, we quickly got back on the trail. We knew there wasn't much farther to go, and we were anxious to set up camp.

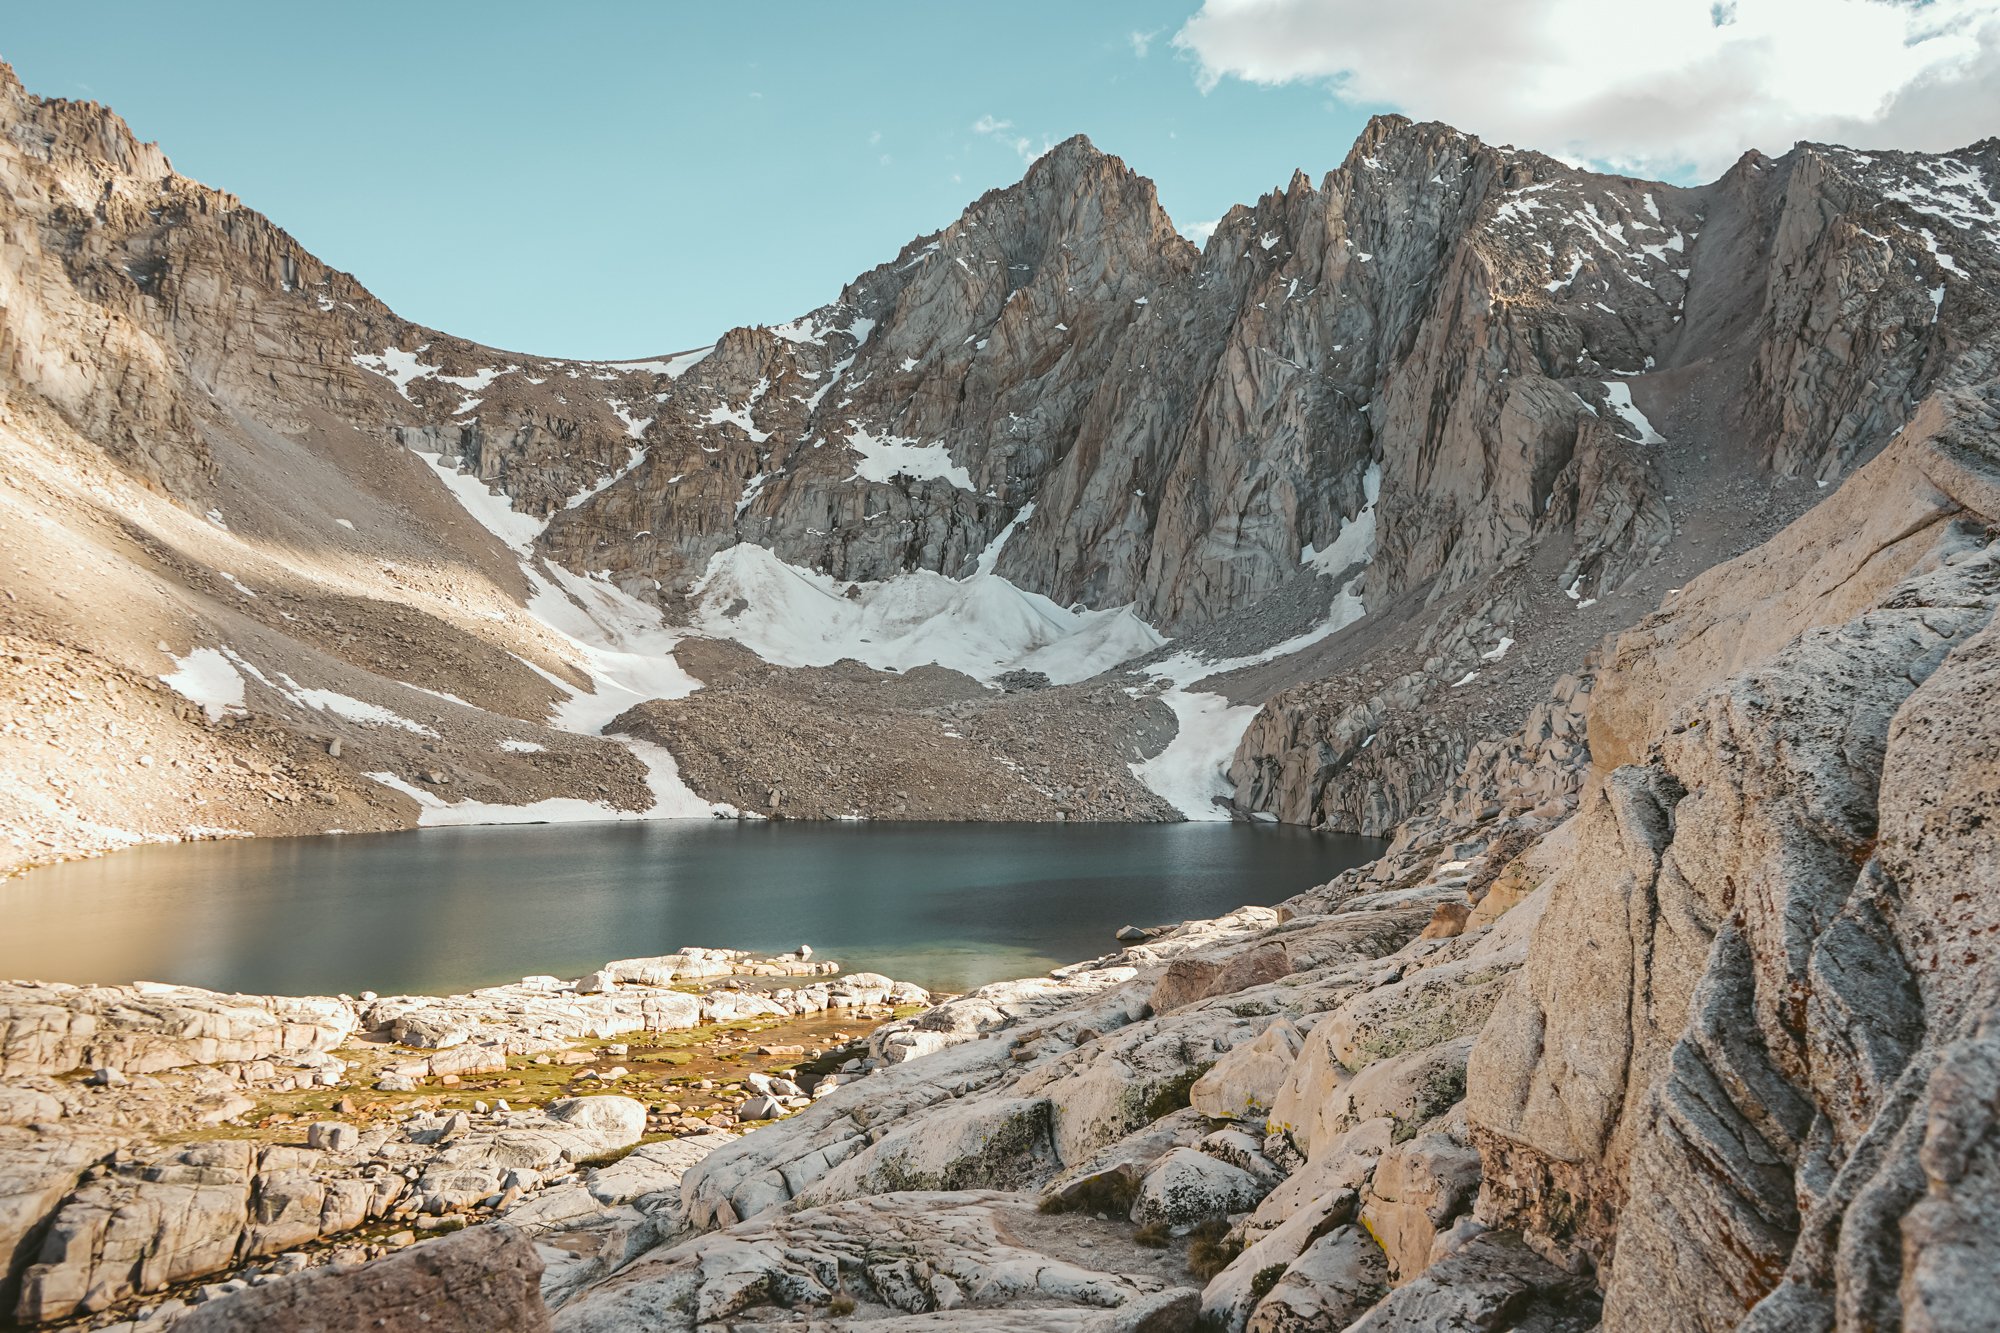
Around the 5.3 mile marker the trail begins to rise up the the side of Lone Pine Creek at Trailside Meadow where you will find the tiniest most beautiful little alpine meadow. This section also marked our last big push up to Trail Camp and as we ascended over this last steep section we caught our first glimpse of Consultation Lake. The site of the lake fueled our anticipation and gave me a little extra pep in my step knowing Trail Camp was just hundreds of feet away.
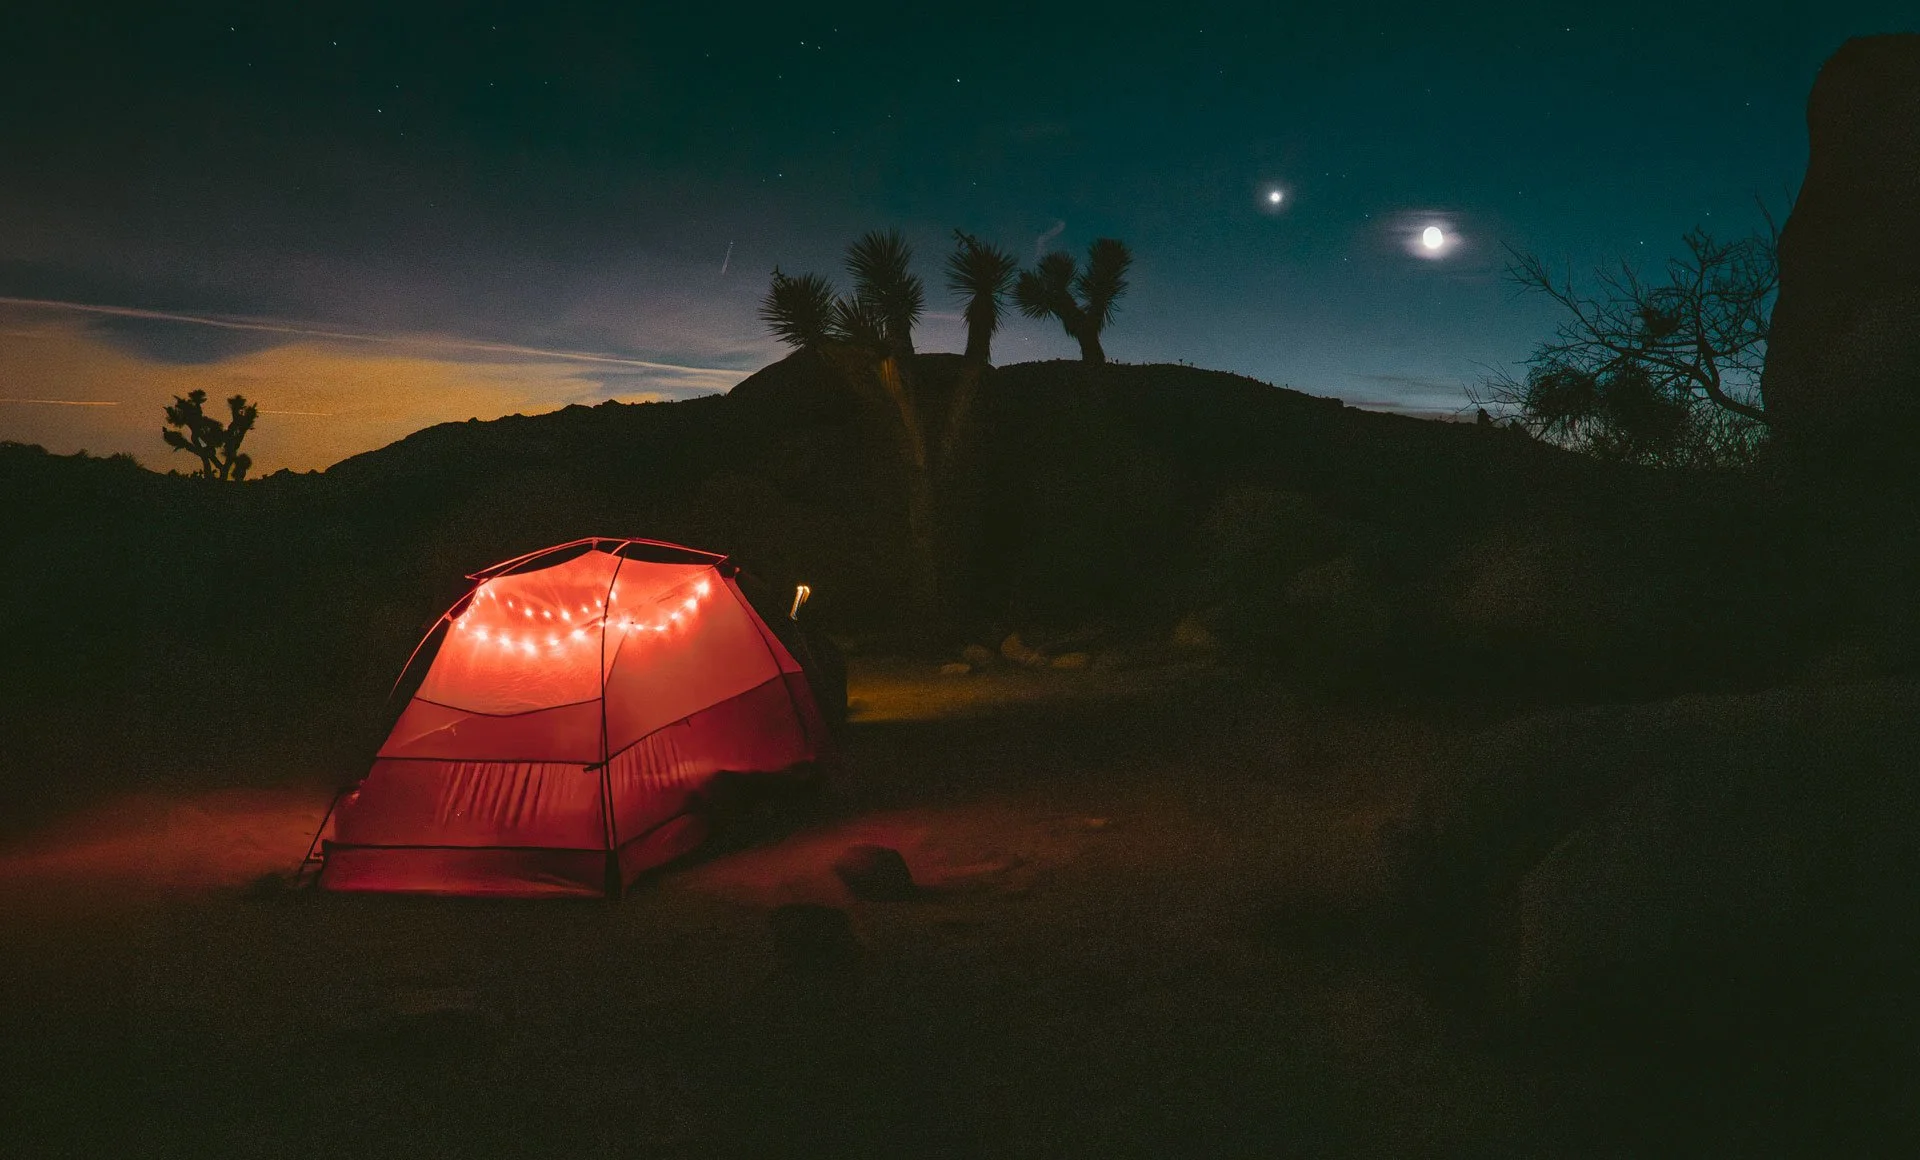
Finally at 6.3 miles, we were entering into Trail Camp at 12,039 feet of elevation. It’s a fairly large backcountry camp and feels like you're basically on the Moon. There is little to no vegetation, so if you find yourself up there on a windy day, it's great to pick a spot behind a boulder to help shelter you from the cold and wind. It was around 6pm when we arrived. We still had plenty of light left in the day and there wasn't much wind, but we made sure to quickly find a vacant spot and set up camp. We were hungry, tired and as soon as the sun set behind the needles towering above us we could feel the temperature drop significantly.
After filtering water from the small camp-side lake politely known as “Pooh Lake” (named for all the abandoned WAG bags at Trail Camp, which… please don’t be that person, pack out your poop), we layered up and waited for the stars.
As the sky faded into a deep, inky blue, we could see tiny headlamps tracing their way down the 99 switchbacks above us. Even after such an exhausting afternoon, it was hard to look away. The stars up there shine differently, brighter, clearer, like the whole sky is putting on a show just for you.


I tossed and turned for most of the night. The mixture of excitement and elevation was overwhelming, but by some miracle, when my alarm rang out at 5:00 am I was up and ready to get back on the trail.

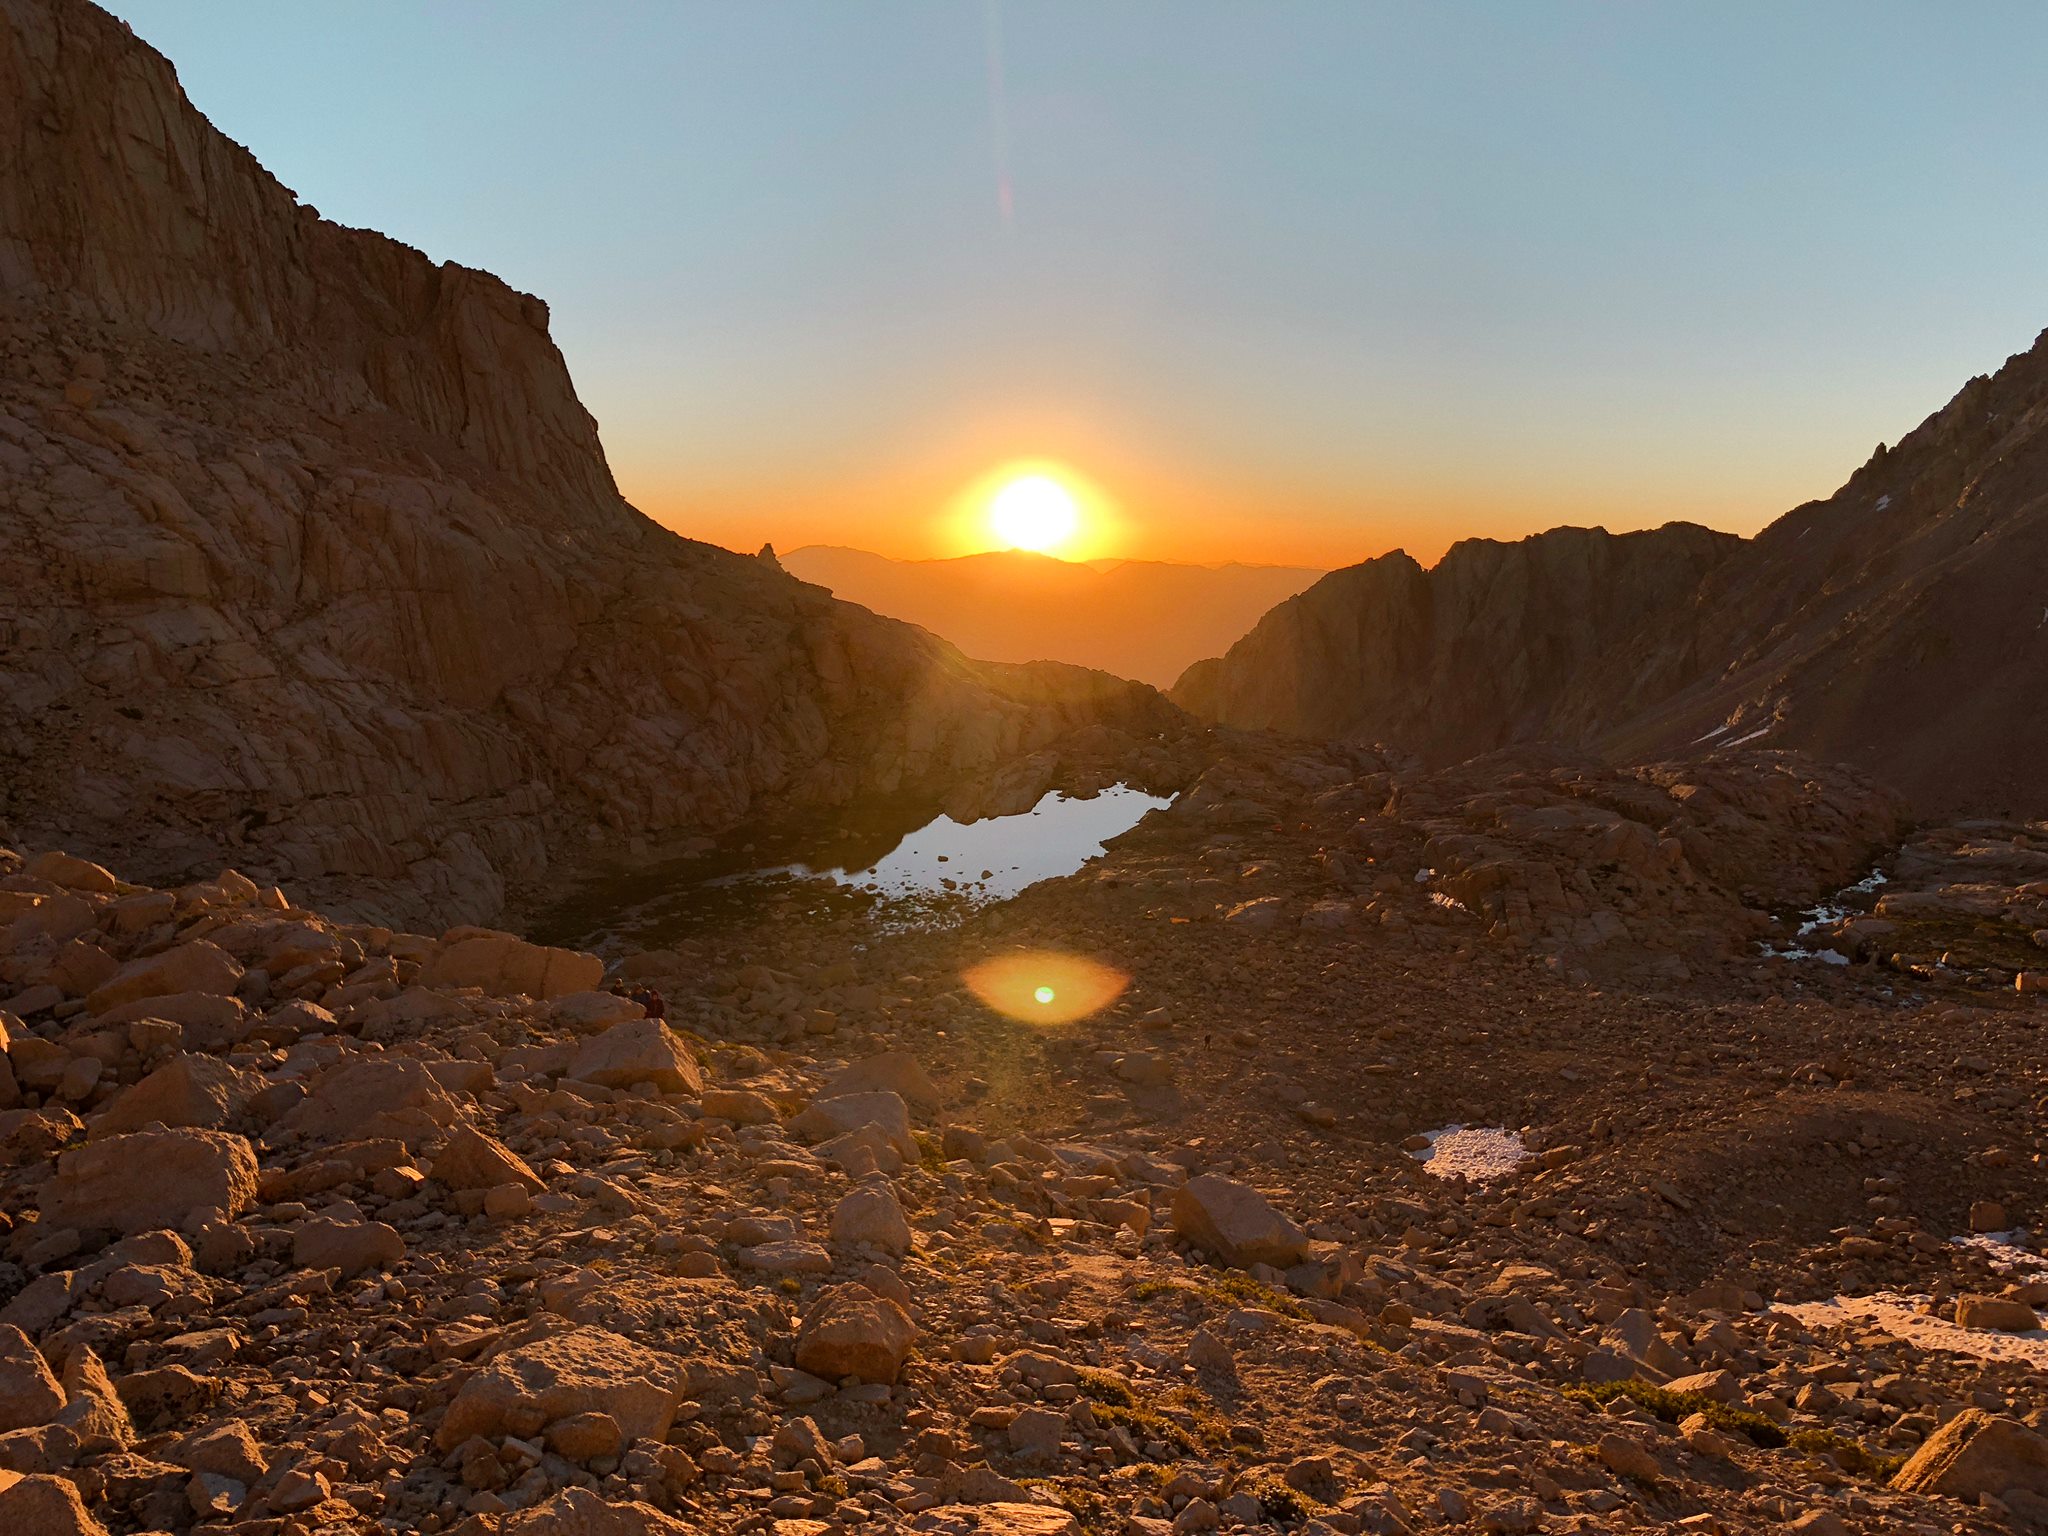
We started up the infamous 99 switchbacks around 5:30 a.m. Why are they infamous? For one, there are… well, either 99 or 97. It’s a long-running debate. We tried counting but lost track somewhere in the 40-something range. What everyone agrees on is that they stretch roughly 2.2 miles and climb over 1,700 feet before finally reaching Trail Crest.
Most people describe this section as brutally monotonous, but looking back, it ended up being one of my favorite parts of the entire hike. Maybe we just hit it at the perfect time, but every turn felt more beautiful than the last. In some spots you could hear meltwater rushing beneath the rocks. Tiny purple wildflowers were popping up out of nowhere. And watching the sun rise over the Sierra was pure magic.
Or maybe it was the sleep deprivation. This is also the part where I did a lot of singing and talking to myself while my brother quietly powered ahead. Either way, it was unforgettable.

About 1.4 miles of the way up the switchbacks you'll find "the cables", a short section of the trail that has a cable like railing along the side. Before our trip, this had been a point of serious anxiety for me. We had heard stories just days before about someone trying to climb over the mass of snow still covering the trail, nearly slipping and falling to his death. So, yeah, that was cool.
However, when we arrived at the cables we were pleasantly surprised to see that nearly all of the snow and ice that had been obstructing the trail had melted! Still, the section is a bit nerve wracking - there is a reason they have installed a "railing" system here after all. Just be mindful of your footing here and you'll be fine.

As we trudged along we eventually ran into a group coming down from the summit who excitedly exclaimed "This is your last switchback!" We were so excited, until we quickly realized, it's also the longest, steepest switchback of them all, but it makes your arrival to Trail Crest that much more rewarding.
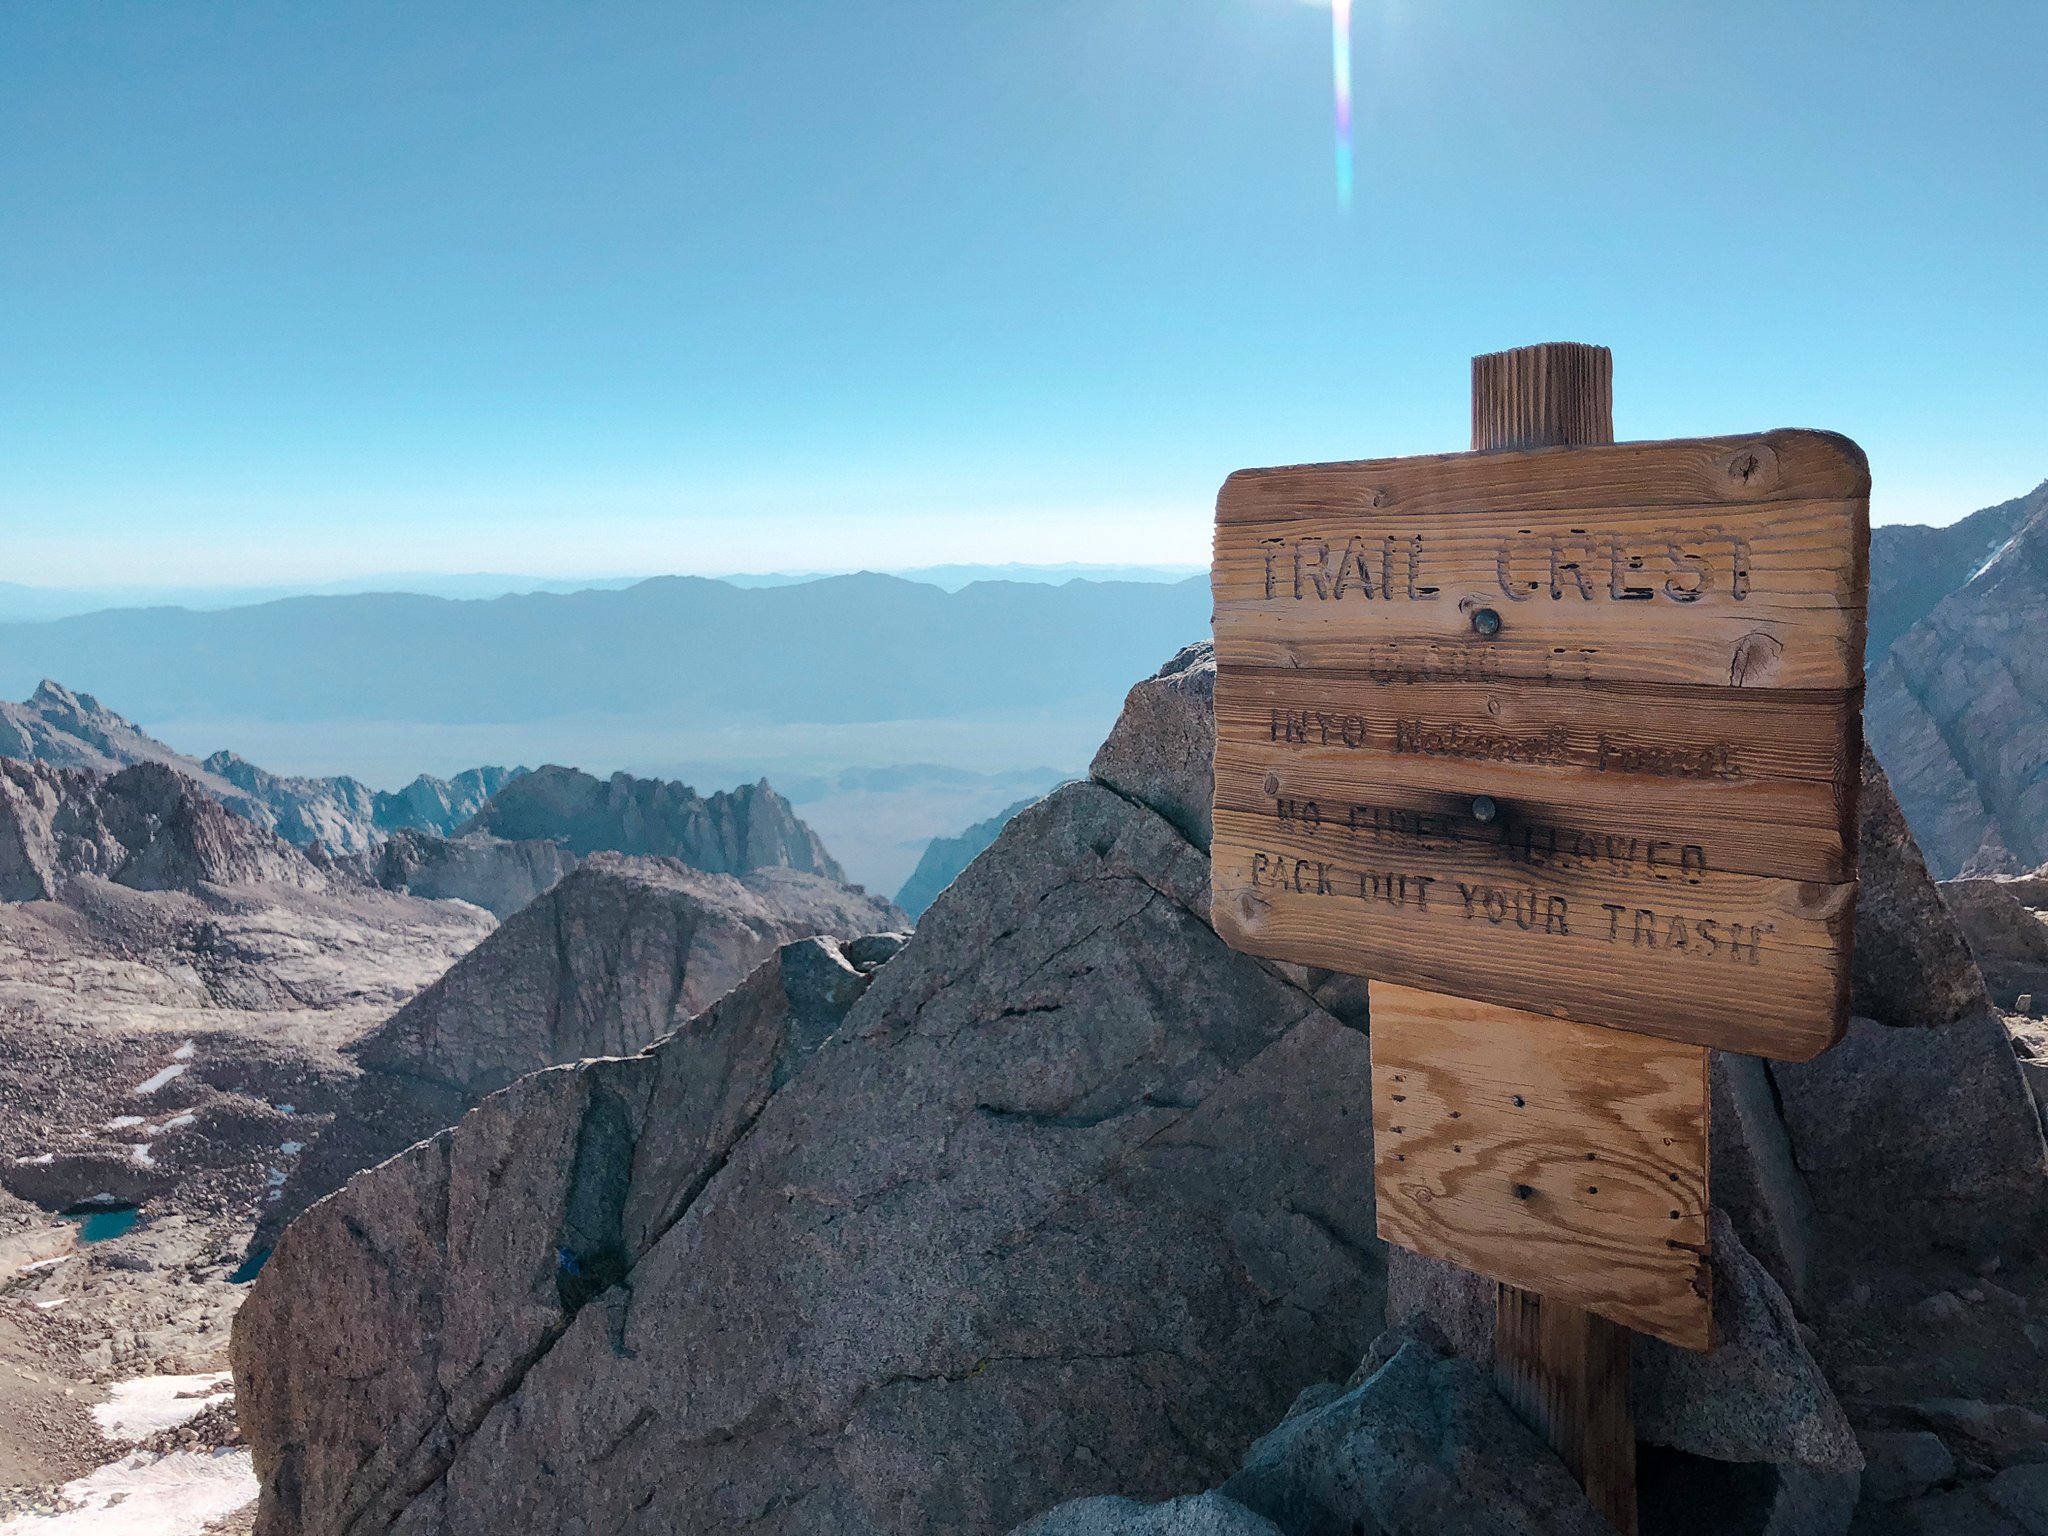
We made it to Trail Crest around 8am and I suddenly found myself getting a little emotional. At that moment, I just knew we were going to succeed. Everything before that seemed uncertain, but at Trail Crest, I could feel it.
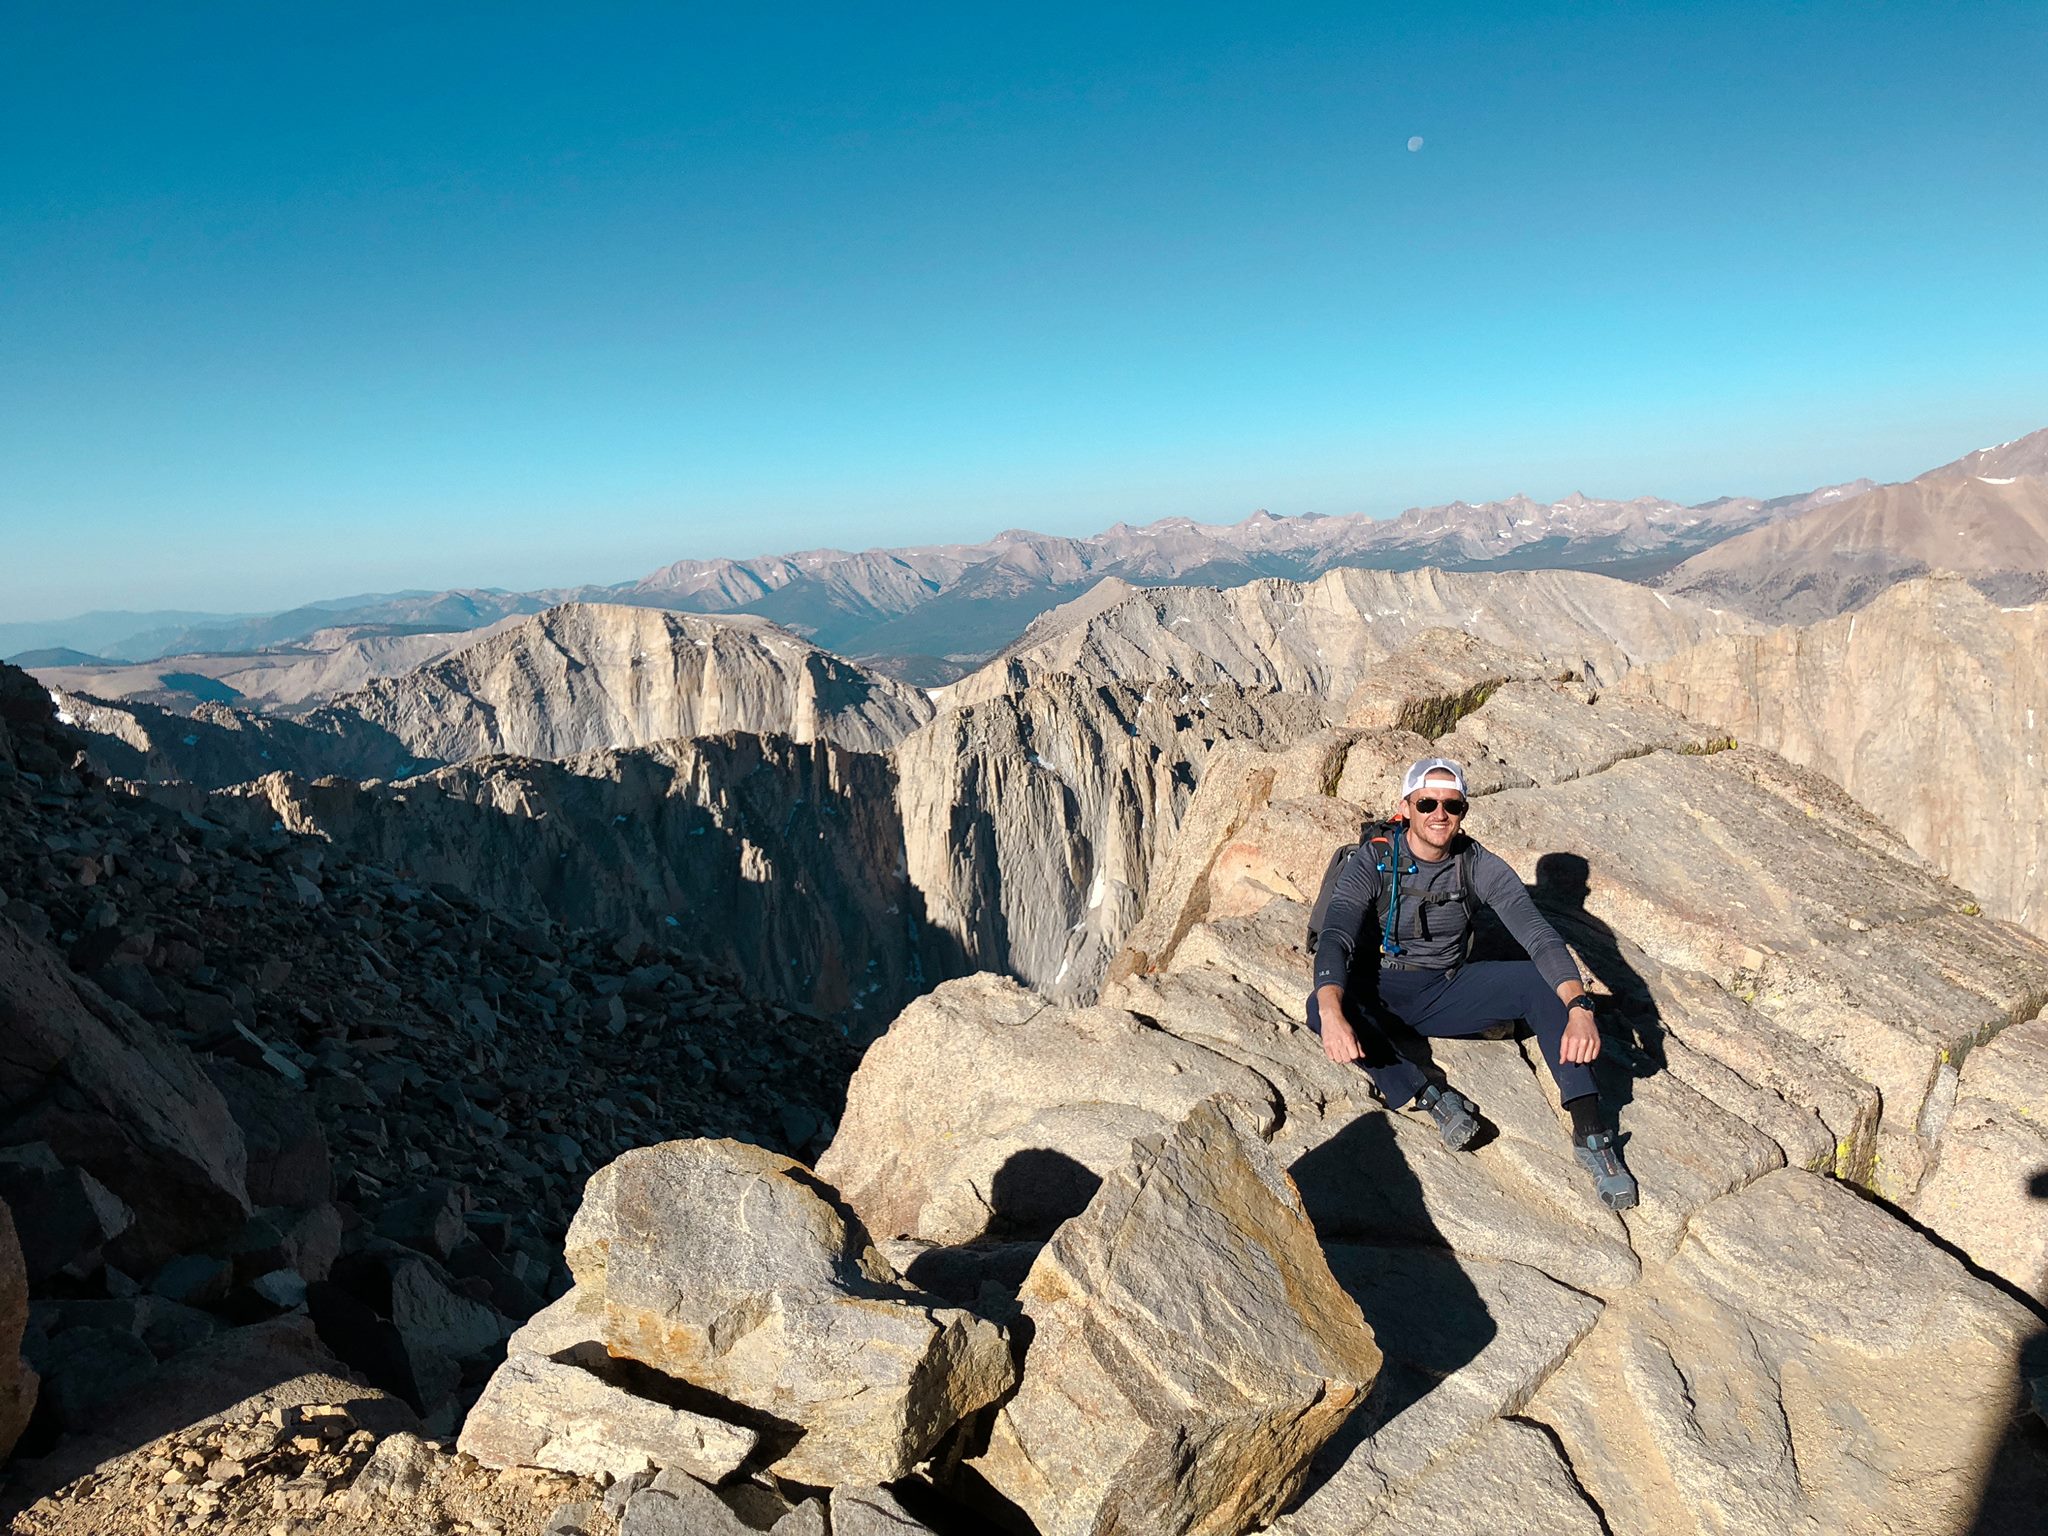
At this point, we had just 2.5 miles and about 845 feet of elevation gain left to reach the summit. Somehow, those were the longest 2.5 miles of my life. Being that close is both incredibly motivating and deeply humbling at the same time. Still, it’s hard to complain when the views along this stretch are absolutely unreal.
After crossing Trail Crest, the trail actually begins to descend. At first, it feels like a gift to your legs, until you remember the summit is still about 1,500 feet above you. That realization can be a little soul-crushing. About half a mile past Trail Crest, the trail intersects with the John Muir Trail, and we started running into a lot more hikers taking breaks or making their final push toward Whitney from the JMT.
This is where many JMT hikers stash their big packs and continue on with day packs. Because of that, it’s also prime marmot territory. These little guys are bold and always on the hunt for snacks, so keep your eyes open and make sure any food is completely secured if you leave your pack behind. They are cute… but they are not to be trusted.

Past the JMT junction, the trail turns into long stretches of unforgiving granite slabs. Hard, knee-busting, and not particularly kind to tired feet. My legs were definitely feeling it by this point, but as usual, the views offered a welcome distraction.
Not long after, we reached a section I had been especially excited for: The Windows. This part of the trail weaves behind narrow, needle-like peaks, creating natural “windows” that open up to sheer drop-offs on the other side, with Trail Camp far below. Photos don’t come close to capturing how vertical it feels. It’s steep, exposed, and honestly pretty wild. If heights make you uneasy, this is one of those sections where it’s best to keep your eyes forward and keep moving.


From The Windows, it’s still about 1.5 miles to the summit. Unfortunately, this stretch is a bit of a mental game. After a gentle descent for nearly a mile, the trail makes you earn back every bit of that lost elevation, and it’s brutal. What kept us moving was spotting the Smithsonian Hut perched way up on the summit. Seeing it in the distance made the goal feel real and somehow pulled us forward.
Just before the final 500 feet of climbing, we stopped for a quick break. Staring up at that last push stirred up a lot of emotions. And okay, I did have words for it. Most of them being explitives.
Around 10 a.m. on July 1, 2018, after cursing our way through those final steps, we made it. My brother let me walk the last hundred feet ahead of him, and when I reached the hut he called out, “How do you feel?” Through heavy breaths, all I could manage was, “We f*cking did it.”


We gave ourselves about 45 minutes at the summit to rest and take it all in. We snapped the classic summit photos, high-fived hikers we’d been leapfrogging with all morning, and quietly FaceTimed our parents (yes, there is cell service up there—but do everyone a favor and keep it low-key; most people are soaking in the serenity). Then we stretched out in the sun for a few quiet moments, letting it all really sink in.
Around 10:45 a.m., we noticed clouds starting to build in the distance, which felt like a clear sign it was time to head down. As hard as it was to leave the summit, the last thing I wanted was to turn a perfect day into a sketchy one by getting caught in a lightning storm on Mt. Whitney.
On the descent, the switchbacks somehow felt longer going down than they had on the way up. The looming reality of packing up camp and hoisting those heavy packs again definitely took a little shine off my post-summit high.
We made it back to Trail Camp around 1 p.m., and just as we finished packing up, the first raindrops started to fall. That was all the motivation we needed. By about 2 p.m., we said goodbye to our campsite and started the long hike out. I don’t usually agree with the saying, but this time it felt painfully accurate: the way down was harder than the way up.
By 6 p.m., after 16 miles that day (22 miles total), 6,130 feet of elevation gain, two marmot sightings, one deer sighting, and a miraculous zero blisters, we tossed our packs into the hatchback, collapsed into the car, and used our very last scraps of energy to point ourselves back toward Los Angeles.
What I learned…
There are only a few things I would change about this hike…
1. Pack lighter
This was my first time backpacking in the Eastern Sierra and my first time carrying a bear canister, so all things considered, I felt pretty good about my pack topping out around 25–30 pounds. That said, on my next overnight trip I’d absolutely invest in a lighter sleeping bag. I was using the REI Trail Pod 30º, which is a solid bag, but it has a pretty large footprint and takes up a lot of space in the pack. At the time, I wasn’t quite ready to splurge on an ultralight option—but after hauling it up Whitney, I would happily pay to shave off a pound or two. If you have a favorite ultralight sleeping bag, I’m all ears.
2. Enjoy the scenery more
I wish I had slowed down mentally and brought my camera and GoPro with me on summit day. That morning, as we packed our day packs, I was determined to carry as little as possible—just snacks, 3L of water, rain gear, first aid, a headlamp, and my poles. The idea of extra weight around my neck felt exhausting before we even started. But looking back, after rewatching footage from day one, I really wish I’d captured more of the summit experience. When you’re deep in it, it’s hard to lift your head. I spent most of that final push staring at my feet, calculating steps, and managing pace instead of fully soaking in the unreal scenery around me.
3. Train more strategically
I did train for this hike, but if I’m being honest, it was pretty haphazard. Next time, I’d commit to more consistent strength training and prioritize a few additional high-elevation hikes in the 6–7 mile range leading up to a trip of this scale. Fitness matters, but so does specificity—and Whitney definitely rewards preparation.
Have you summited the lower 48’s highest peak? Tell me about your experience in the comments…